Decorating is one of the more exciting aspects of moving into a new apartment home. Before you begin unpacking, you’ve mentally already placed your various pieces of wall art or are thinking about what you’d like to buy.
Better Homes & Gardens suggests you tackle empty wall space by, “infusing it with warmth and personality,” using creative artwork, mixed media and vintage pieces that bring out who you are.
Of course, hanging pictures on drywall is tricky. You’ll need to know if you’re hanging pictures on drywall or studs, for starters, and you’ll need the right equipment — such as drywall nails and drywall anchors.
Check out these apartment decorating tips for creating a space you love while working with the materials you have.
Hanging pictures on drywall or studs
The most secure way to hang a coat hook, wine rack, picture or any piece of wall art is to attach a screw to a stud.
What is a stud?
Not exactly sure what a wall stud is? Let us clarify — its beams of wood beneath the drywall that act as the wall’s frame. In most homes or mixed-use buildings, studs find themselves typically spaced 16 inches apart. They can run vertically, horizontally or diagonally. Although most home builders follow these guidelines, it isn’t a guarantee — so your first step in finding a place to hang pictures on drywall is to find the studs.
How to find a stud
The easiest way to find a stud in your wall is to look for electrical outlets and light switches. Standard electrical outlets and light switches typically attach to studs.
All you have to do is remove the cover plate of the electrical outlet or light switch and confirm there’s a vertical wooden support beam — stud — behind it. Once you’ve found one stud, begin measuring outward, marking off every 16 or 24 inches based on the spacing between studs in your home.
You can also buy a stud finder. They let you find studs under the drywall without having to measure. Residential stud finders are fairly inexpensive, with prices ranging between $10 and $50. Don’t go buy yourself an industrial deep-scanning stud finder, though — you won’t need all the bells and whistles and a residential stud finder will do fine. The studs in your drywall are shallow enough for detection via a stud finder sensor.
When you don’t have any other options, you can sometimes tell where a stud is by knocking on the drywall. A dense, muffled knock means there’s a stud behind the section of drywall you’re knocking on, whereas a more hollow sound probably means that there’s no stud behind the drywall.
Hanging pictures on drywall with a stud
Once you find the stud, it’s time to break out the tools and start hanging. Make sure you’ve reviewed your lease first and you have the green light to put holes in your walls. Drilling into a stud will create an obvious hole you will need to fill before you move out.
Drilling into a stud
Use the drill bit to slowly drill into the drywall and then the stud — creating a hole in the location you marked. Always look out for plumbing and electrical cords when drilling into a stud.
Apply gentle pressure while you’re drilling to know when you’ve hit the stud. Trust us, you’ll feel it.
Keep your drill at low speed, and make sure to choose the right bit for the job. A large bit isn’t necessary when drilling into a stud.
Insert the drill and pull it out slowly once you’ve drilled your hole into the stud.
Hanging your picture
If your electric drill has a screwdriver bit, swap it in. Otherwise, a manual screwdriver will work. Place your screw into the small hole you created, and use the screwdriver to screw it in. Then, you can hang your picture.
When you don’t have a stud
Because drywall isn’t very sturdy, be careful about hanging pictures and art from a spot that doesn’t have a stud. If you’re able to make holes in your walls, here are some options to consider for hanging pictures on drywall without a stud.
1. Drywall anchors
Drywall anchors look like hollow plastic screws. They’re a great ally when working with drywall since they’re designed to lodge directly into it. It’s like a one-way valve. The anchor slides into the wall, then the hook deploys and you can’t pull it back out. The design of drywall anchors ensures that your art remains on your wall. This is especially important if you’re hanging a heavy framed print or painting.
2. Expanding plastic sleeves
These drywall anchors have a design complete with wings that spread out to help keep it — and what you hang from it — in place. It should fit snugly into the hole you drill, to the point that you might need to tap it with a hammer to get it all the way into the drywall. Intended for hanging lightweight and medium-weight items, expanding plastic sleeves work best for securing heavy picture frames, bulletin boards, lightweight framed mirrors, lightweight shelving and wall-mounted mirrors to the drywall.
When shopping for expanding plastic sleeves, check the packaging since only ones intended for drywall will let you put a screw into them. If you don’t know the composition of your walls, ask your leasing office or landlord. Definitely check because you may not even have drywall and other expanding plastic sleeves for different materials exist.
3. Drywall nails
Drywall hangers and nails work in two different ways. The nails drive into drywall and plaster walls at an angle, which allows them to use the wall surface as leverage and support. These are perfect for hanging items up to about 20 pounds. If you have a picture that is heavier than that, use a flat-mounted hook and anchor.
Drywall hangers and nails come in a variety of sizes, sold separately and in kits. Grabbing a simple picture hanging kit from your local hardware store is always a good idea too. You’ll then have all sizes of drywall nails and hooks you may need on hand.
4. Tap-in expanding anchors
For hanging loads less than 10 pounds, use a handy little tap-in expanding anchor. Tap the pointed end and flat shank into the drywall until it’s flush. Once your shank is flush with the wall, expand the anchor by driving a #6 screw into the hole.
5. Toggle bolts
Toggle bolts work for super heavy loads, like a coat rack. They’re a little more difficult to install, as they require a larger hole, proper insertion into the drywall and careful screwing to expand the toggle and bring it flush to the inside of your drywall.
To use toggle bolts, drill a hole large enough for both the screw and toggle to fit into your drywall. Fit the item you wish to anchor over the bolt, insert the toggle and tighten. This will anchor the toggle to the inside of your drywall, creating a very sturdy place to hang heavy loads.
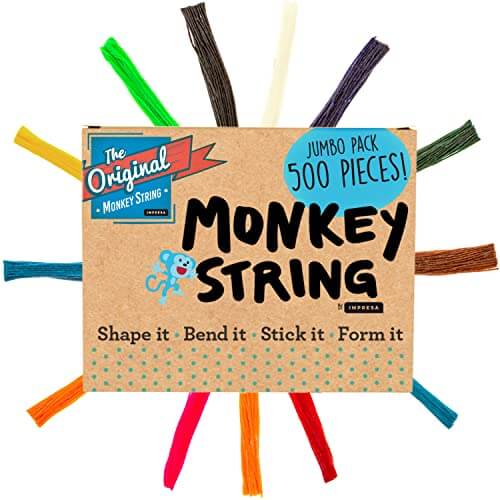
6. Anchor wire/monkey hooks
Anchor wire, a.k.a. “monkey hooks,” are curved pieces of metal that look similar to the hook on a dry-cleaning hanger. The big difference is that they’re very sharp and pointed at one end. On the other, anchor wires have a divot and this is where your picture goes. These are great for mirrors or artwork hung with a wire that runs across the back of the framed item.
To use an anchor wire, press the sharp end into the wall at a downward angle, rotate the anchor wire 180 degrees and gently pull it back out until it doesn’t move. Once situated, you’re ready to hang your object.
7. Adhesive strip or hooks
Hanging pictures without nails is possible too — you don’t always need to make holes in your walls. If you’re not allowed to use drywall nails and don’t have the equipment you need to make a lot of holes in the wall, you can still hang your wall decor using adhesive strips or hooks.
These products stick to the wall without damaging the paint (as long as you follow the instructions properly). Adhesive strips also stick to the art for even more security. Products come in different sizes and use different glue strengths. Make sure to check the packaging before purchasing to ensure a sturdy hang.
Get the right décor up no matter what
The types of walls you have and the rules within your lease for hanging pictures on drywall need not limit what you can do. With the right tools and accessories, you can fill your walls with items that reflect your personality and passions — creating a space that’s truly yours.
Lesly Gregory has over 15 years of marketing experience, ranging from community management to blogging to creating marketing collateral for a variety of industries. A graduate of Boston University, Lesly holds a B.S. in Journalism. She currently lives in Atlanta with her husband, two young children, three cats and assorted fish.
When buying a home, it can be challenging to know what to look for. Should you look for a garage, a spacious bedroom or even a big driveway? You could, but you should also look for structural aspects of the home. Ensuring that the house you are buying is made with quality materials that will not either wear down or break, will project a happy and safe home ownership.
Enjoying our content? Subscribe to our free weekly newsletter to get real estate market insights, news, and reports straight to your inbox.
Below are the specific things you should look for in a house to make sure that your future home will stand strong!
Exterior Face
The base of a house is what keeps it afloat. Making sure that you have a safe foundation is key.
Brick is very low maintenance and long-lasting but there are limited colour options and it does get quite expensive. Brick is also eco-friendly and is resistant to fire and infestations that may occur. It is also a great temperature regulator that can increase the comfortability of your home.
Vinyl Siding is quite durable in various weather conditions and is significantly cheaper but it is not as eco-friendly and can be susceptible to leaks. Though vinyl siding doesn’t require a lot of maintenance, in the case that it does break or tear, the entire plank will need to be repaired which can become costly.
Roofing
Metal roofing is more expensive, lasts usually twice as long as asphalt, endures worse weather, has better energy efficiency and tends to weigh less, putting less stress on your foundation.
Asphalt roofing is cheap and easier to install, it is somewhat durable but can be damaged with weather.
Slate roofing is made up of tiled slates that can come in various colours. This roofing type is very durable, fire-resistant and eco-friendly as it can be recycled. The downsides are that it is very expensive, heavy and takes a lot of work and precision to install.
Foundation
Looking for the foundation can help buyers avoid costly repairs if it is already damaged and possibly leaking. Always remember to ask the realtor about the foundation if it is not visible. Here are the three types of foundations:
Insulation concrete form incorporates insulated forms and poured cement. This option is expensive but increases energy efficiency and is far stronger than any other form.
Poured cement is the standard foundation for many homes. It is reliable and durable with a lesser tendency to crack while being easier to repair if needed.
A cement block wall is more prone to leaking because of cracks that can occur and is harder to fix, but is the more affordable option.
Windows
It is also important to inspect the windows on the property and make sure that they are operating properly. Faulty windows can spike your energy bill and be a safety concern. Here’s what to do and look for:
Double-pain glass is something to look for as this means that you have quality windows. This helps with sound, energy efficiency and durability.
Research the manufacturer of the windows if you can’t tell to see the credibility of the window and if it is a quality brand.
See if they are operating properly. Are they moving smoothly and sealing with no cold air seeping through?
Doors
Just like windows, it is vital to check your doors for operational malfunctions so you can enjoy your home to the fullest. Here’s what to look for:
Are they operating properly? Ensure that there is no air drafting through, no major cracks visible and that there is no condensation between the glass panel of your door.
Check the weather stripping around the door to ensure proper sealing which helps with energy efficiency and comfortability.
Are you currently looking for a property? Call us today to talk with one of Zoocasa’s experienced real estate agents to guide you through the exciting home-buying journey!
Whether you’re a minimalist to the core or simply like things neat, a minimalist desk setup offers incredible advantages on the mental and material plane. Minimalist principles are, in essence, about conscious decision-making and living a purpose-driven life.
It’s understanding what resonates with you on a very personal level, what brings more beauty and joy to your life and what is just taking up space. As The Minimalists eloquently state, “Minimalists search for happiness not through things, but through life itself.”
Your workstation is the perfect backdrop for embracing this philosophy. After all, do you really need 25 different writing utensils, three notebooks, every-color-in-the-rainbow sticky notes and pictures of friends you last saw in high school? Yes? If they bring you joy, then keep them, by all means!
Once you’ve decluttered, cleaned and streamlined, you can create a space for the things that matter the most. And, in the process, you’ll not only clean your desk but your mind as well.
Let’s explore the neuroscience behind having a clean desk and the 15 minimalist desk setup ideas to help you get there.
Clearing your workstation — clearing your mind
Numerous studies in Harvard Business Review confirm what you innately know: clutter affects your productivity while increasing stress and anxiety. How many times have you wasted precious minutes searching for a document in a pile of papers, growing increasingly agitated? As a human, probably many. Life gets busy, and cleaning the desk gets buried in the pile of the many “to-do’s.”
These studies also prove clutter’s negative effect on the ability to focus, distracting you from your best intentions. It can even increase the tendency to snack on junk food. With that in mind, let’s tackle your desk and create a minimalist desk setup one step at a time.
1. Get a fresh start
To create a desk that leaves you inspired, you need to start with a fresh, clean slate. Remove everything and put it in a box or two. If you need more than two boxes, well, we’ll discuss that later.
2. Choose the right desk
For some, creating a minimalist desk setup may require a new desk. Fortunately, today’s designs offer simple solutions that can replace big, bulky and uninspiring models. Consider wall-mounted desks that free up space while creating a clean, uncluttered look. Some even double as bookshelves or fold down from the wall for optimum aesthetics.
A simple desk with room for a set of drawers or filing cabinets underneath gives you the space you need to keep your desktop clean and clear.
3. Approaching the minimalist mindset for desk setups
Before indulging in the dividers and shelves that can help you maintain order, it’s time to inspect your belongings. If you’re a “things” person, this activity can be a little challenging. Put on some soft jazz or music with nature sounds and get into your Zen zone. Then, put each item you pick up into a keep, toss or give-away pile.
Remember, the minimalist mindset is based on the theory that “less is more.” Everything you own either serves a purpose or contributes to your peace of mind. Imagine every item you let go of reducing stress, increasing productivity and enhancing your life. Ask questions like, “Do I need this? Does it add beauty? Does it bring joy? “
Do you know that some minimalists have paired down their belongings to less than 100 items? That’s everything — clothes, shoes, furniture and pens. Hard to imagine, right?
4. Stick on an under-desk drawer
Drawers are extremely helpful in maintaining a clutter-free desk zone. If you don’t have drawers, a simple solution is self-adhesive under-desk drawers. Add drawer organizers to ensure every item has a place to call home.
The idea is to keep as much as possible off your desk. A minimalist desk setup typically consists of your computer, a lamp and maybe a picture or plant. Pairing down to that level makes you look at each item you own through the lens of value and love.
5. Do away with wires
Wires have no place in a minimalist desk setup. Fortunately, we live in a wireless world! Consider getting a wireless mouse and keyboard. If some wires must remain, a cable management tray or backside wire organizer can help keep your desk and floor uncluttered.
6. Create space with a desk organizer
For some people, opening a drawer whenever they need a pen, scissors or notepad can suck the joy right out of their clutter-free desk. If you can relate, a desk organizer adds a little more “stuff” to your desktop but puts everything you use every day in easy reach.
These hold your essentials, with some including a special place for your smartphone. You can also select organizers that align with your design, whether made out of mesh, wood or bamboo.
7. Use understated design elements
Some minimalists consider an all-white color scheme the best approach. However, neutral colors can bring the natural world indoors and add a nice design element. Ideally, keep the color palette monochromatic with varying shades of the same hue. Colors to consider include natural wood tones, blue, gray, taupe and soft green.
From desks to storage cabinets, a minimalist desk setup considers natural materials, a simple design and straight lines.
8. Go paper free
Going paperless is one of the best ways to achieve a minimalist desk setup. And thanks to today’s digital world, it’s possible! Receipt and paper scanners let you store important documents on your computer, backing them up to an external drive or cloud storage service. Note-taking apps rid your space of Post-it notes, and digital to-do lists keep your life organized.
9. Optimize light
The right lighting improves productivity and enhances your workspace. Adjustable task lighting is ideal for your desk, illuminating the activity at hand. Consider LED desk lamps with a swing arm and adjustable temperature and brightness settings. The most important consideration? Make sure you love it.
10. Add life to your minimalist setup
One or two plants add life and beauty to your space. We care for them, and, in turn, they care for us. Numerous studies show their many health benefits include improving air quality, increasing feelings of well-being, reducing stress and improving concentration. Plants shown to improve the air include spider plants, Boston ferns and bamboo palms.
11. Enjoy an artistic touch
One breathtaking painting or beautiful nature scene can refresh your senses and improve your mental outlook. From a tropical waterfall to endless waves or mountain peaks, choose an image that inspires you.
12. Add a cabinet
We know minimalism is more about subtracting than adding. However, to keep things off your desk requires a place to put them. Not all of us can pair down to 100 items! A small, streamlined upper cabinet with two or three shelves creates a space for books, journals, inspiring quotes and photos.
You can ensure it blends in with your design by choosing bamboo, wood or metal units and sticking to the same color scheme. You can even use wire shelves for an industrial look. Consider ones with doors if you want to retain the ultimate minimalist decor.
13. Hang a shelf above your desk
One simple shelf above your desk gives you the space you need to keep everything off your desk. This solution is ideal for smaller desks and if you have a creative muse who enjoys vision boards, writing and drawing. In one quick maneuver, the few items on your desk can transfer to the shelf, giving you the space to create.
14. Install a vertical shelving unit
A thin vertical shelving unit tucked next to the desk in a corner wall offers a space for color-coordinated baskets, a few books and a plant. Choose square wicker baskets that slide right into the shelf and look like they belong.
These can hold your current projects in organized files for easy access. Consider placing a philodendron plant on the top shelf, letting it cascade down, bringing a touch of greenery.
15. Sit comfortably
While standup desks are growing in popularity, thanks to the phrase, “Sitting is as bad as smoking,” many people still prefer to sit at their desks. Minimalist desk chairs follow the monochromatic rule and blend in with your chosen design. They are also simple (instead of big and bulky), comfortable and ergonomically designed. Popular options include those with wooden legs.
The minimalist approach to desk design
Minimalism is all about functionality. It’s ridding yourself of chaos and embracing a simpler lifestyle where everything has a purpose and a place. Start with decluttering, then use these tips and tools to create a minimalist desk setup. Who knows? Your entire apartment may become a minimalist zone.
Still looking for a rental space to optimize your work and life? Take a look at our available apartments for rent.
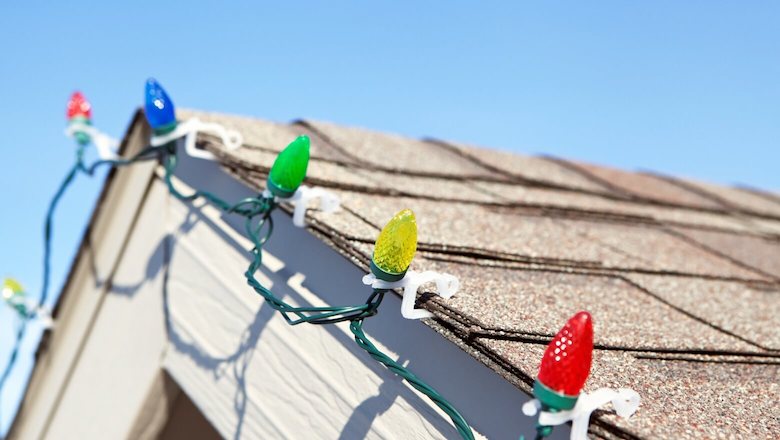
Many people love showing their holiday spirit with Christmas lights, whether just a strand of twinkle lights around a window or going all-out like the Griswolds.
While these lights are festive, it’s worth noting that they aren’t free. In fact, the cost of running holiday lights rose 13% last year, costing the average household $15.48 vs. $13.41 the prior year.
In this economy, every dollar can count, so if you want to learn how much it costs to run Christmas lights for a month and how to reduce that expense, read on.
Here, you’ll learn more about:
• How much do Christmas lights cost to run?
• How much does it cost to run Christmas lights for a month?
• How can you save money on your holiday light electric bill?
Factors Affecting the Cost of Running Christmas Lights
Running Christmas lights uses energy, which can translate to higher utility bills. How much of an increase you see in your electric bill can depend on a number of factors, including:
• How many strands of lights you use
• The type of bulbs used in each strand
• The number of hours you run your lights each day
• How many days you run Christmas lights for
• Where you live and what you pay per kilowatt hour for electricity.
All of these things can influence how large your Christmas lights electric bill turns out be once January rolls around. Understanding what you could wind up paying can help if affordably celebrating the holidays is your goal.
Keep in mind that other costs can drive up electric bills during the holidays, apart from Christmas lights. If you’re using the oven more often to prepare holiday meals, for example, that can result in a higher electric bill. You may also see a bigger bill if colder weather means the heat is kicking on more often or your kids are home all day using electronics more while school is out. Lowering your energy bill may require a multifaceted approach.
How Much Electricity Do Christmas Lights Use?
The amount of energy used by Christmas lights can depend on the type of bulb and the number of bulbs per strand. The most popular options for Christmas lights include incandescent mini lights, mini LED lights, and ceramic C7 lights.
So which type of bulb uses the most energy?
The simplest answer is to look at the wattage of Christmas lights, based on bulb size and number of bulbs per strand. For example:
• With C7 lights, for instance, you’re typically getting 25 lights per strand.
• With mini LED lights, you’ll normally have 50 bulbs for a 14-foot strand and 100 bulbs per 32-foot strand.
• With mini icicle lights, you often have 300 bulbs for a 26-foot strand.
Here’s how the average wattage for each one compares, though note that incandescent bulbs stopped being manufactured and sold in August 2023 (some people may still own and use strands of these, however):
• C7 lights: 5 watts
• C9 incandescent lights (2-¼” long): 7 watts
• Mini incandescent lights: 0.4 watts
• Mini LED lights: 0.07 watts
Between those three options, mini LED lights draw the least amount of energy per strand while C7 lights draw the most.
LEDs possibly lowering energy costs by up to 90% vs. the other options. Switching to LEDs could be a way to save money daily during the holidays.
Also note that you’d need four strands of C7 lights to equal the same number of bulbs in just one strand of incandescent or LED mini lights. This is important to understand because it can affect the number of kilowatt hours used and your overall energy costs.
Recommended: 23 Tips on Saving Money Daily
Cost of Running Christmas Lights
So how much do Christmas lights cost to run for a month? Or longer? Calculating your estimated cost of running Christmas lights matters when trying to lower your electric bill during the winter months. Again, what you’ll pay can depend on a variety of factors, including where you live and how much electricity costs.
The average household pays $0.17 cents per kilowatt hour for electricity, according to the U.S. Department of Energy, but prices may be significantly higher or lower in different parts of the country due to cost of living differences.
If you live in Connecticut, for example, you might pay an average of $0.21 cents per kilowatt hour. People living in Florida, however, might pay an average of $0.11 cents per kilowatt hour. Residents of Hawaii typically pay the most, currently spending $0.32 cents per kilowatt hour.
Here’s how to figure out how much you’ll pay for Christmas lighting:
• Multiply the wattage of the lights by the hours per day the lights will be on, then divide by 1,000 to find kilowatt hours per day
• Multiply kilowatt hours per day by your cost of electric usage to get the cost per day
• Multiply the cost per day by the number of days your lights will be on
Calculating the Cost of Christmas Lights
Now, for how much does it cost to run Christmas lights? Here’s a look at what it would cost to run C7 lights, C9, and mini incandescent lights, and mini LED lights for six hours a day for 30 days, using a price of $0.14 cents per kilowatt hour. Here’s what you’d pay for each one:
Bulb Type
Hourly Cost
Daily Cost
Monthly Cost
C7 (25 bulbs, 5 watts per bulb)
$0.0175
$0.105
$3.15
C9 (25 bulbs, 7 watts per bulb)
$0.025
$0.15
$4.50
Incandescent Mini Lights (100 bulbs, 0.45 watts per bulb)
$0.0063
$0.0378
$1.13
Mini LED Lights (100 bulbs, 0.07 watts per bulb)
$0.0042
$0.0252
$0.76
Keep in mind that these costs are for just one strand of lights, as noted. If you string together several strands on your tree, frame your windows with lights, and then drape your shrubs or street-facing windows outdoors with more, your costs will of course go up.
Also, in terms of what the average person spends on Christmas lights, it can vary by a state’s cost of living, as well as by what kind of bulbs are used. Louisiana residents who run LED lights, for example, would likely spend the least, since they are paying just over nine cents per kilowatt hour (currently the lowest rate in the US) and they would be using energy-saving bulbs. Meanwhile, Hawaiians who opt for incandescent bulbs would probably spend the most, since their bulbs use a considerable amount of power and they currently pay the highest national rate for energy of almost 33 cents per kilowatt hour.
💡 Quick Tip: Most savings accounts only earn a fraction of a percentage in interest. Not at SoFi. Our high-yield savings account can help you make meaningful progress towards your financial goals.
Tips to Save on Your Christmas Lighting Bill
If you’re looking for ways to lower your energy bill when you start plugging in your holiday lights, follow this advice.
Embracing Energy-Efficient LEDs
As mentioned, the wattage of Christmas lights plays an important part in determining how much you pay for electric bills over the holidays. Between C7 lights, incandescent lights and LED lights, LED lights are highly energy-efficient. According to the Department of Energy, residential LEDs that are ENERGY STAR rated use up to 75% less energy and last 25 times longer than incandescent lights.
People who use LED Christmas lights tend to pay far less than those using incandescent bulbs or C7 lights. So it follows that an easy way to save money on your electric bill and reduce energy usage would be to use mini LED lights as often as possible. Aside from that, LED bulbs emit less light and are less likely to overload sockets, making them a potentially safer option for Christmas lighting compared to other types of bulbs.
So if you still have some incandescent bulbs in your box of Christmas decorations, you may want to think about swapping them out for LEDs. (You won’t find incandescents made or sold in the US anymore either.)
Benefits of Solar-Powered Outdoor Lights
You might consider using solar-powered outdoor lights on your house over the holidays. These strands depend upon energy collected by small panels that gather and hold energy from the sun during the day.
These strands don’t plug in and draw no electrical power. So they can be especially easy and economical to use over the holidays.
Battery-Operated Lights for Smaller Displays
If you like to create smaller displays, you might consider battery-powered strands of lights. There is a wide range of how long these lights will stay illuminated, but this can be a good unplugged option to try for small-scale displays. While you do have to pay for the batteries, it can be cheaper than plugging in lights for weeks on end.
Recommended: 18 Common Misconceptions About Money
The Takeaway
A higher-than-usual electric bill can put a damper on your holiday celebrations. Estimating your potential costs beforehand can help you manage utility expenses. And you can decide whether it’s worth it to invest a little money in upgrading your current Christmas lights to energy-efficient options.
Having the right banking partner, such as one with budgeting tools, can also help make tackling high utility bills after the holidays easier.
Interested in opening an online bank account? When you sign up for a SoFi Checking and Savings account with direct deposit, you’ll get a competitive annual percentage yield (APY), pay zero account fees, and enjoy an array of rewards, such as access to the Allpoint Network of 55,000+ fee-free ATMs globally. Qualifying accounts can even access their paycheck up to two days early.
Better banking is here with up to 4.50% APY on SoFi Checking and Savings.
FAQ
Do LED Christmas lights use a lot of electricity?
Compared to C7 lights or incandescent mini lights, LED Christmas lights use the least amount of energy. Specifically, they can use up to 90% less energy while lasting longer. LED Christmas lights also emit less heat and can be easier to install than other types of holiday lighting.
Do Christmas lights raise your light bill?
Holiday lights can raise your electric bill during the winter months. How much it costs to run Christmas lights can depend on several things, including the type of bulbs used, how many light strands you’re running, how long you turn the lights on for, and the average cost of energy per kilowatt hour in your area. Using timers and switching to energy-efficient bulbs can be helpful for reducing your Christmas lights electric bill.
Do Christmas trees use a lot of electricity?
Christmas trees can use a lot of electricity, depending on the type of lights you use, the number of strands on the tree, and how long you leave your tree plugged in each day. Using mini LED lights can reduce electric costs for Christmas tree lighting, while using C7 bulbs to light your tree could result in a higher energy bill.
The SoFi Bank Debit Mastercard® is issued by SoFi Bank, N.A., pursuant to license by Mastercard International Incorporated and can be used everywhere Mastercard is accepted. Mastercard is a registered trademark, and the circles design is a trademark of Mastercard International Incorporated.
SoFi members with direct deposit activity can earn 4.50% annual percentage yield (APY) on savings balances (including Vaults) and 0.50% APY on checking balances. Direct Deposit means a deposit to an account holder’s SoFi Checking or Savings account, including payroll, pension, or government payments (e.g., Social Security), made by the account holder’s employer, payroll or benefits provider or government agency (“Direct Deposit”) via the Automated Clearing House (“ACH”) Network during a 30-day Evaluation Period (as defined below). Deposits that are not from an employer or government agency, including but not limited to check deposits, peer-to-peer transfers (e.g., transfers from PayPal, Venmo, etc.), merchant transactions (e.g., transactions from PayPal, Stripe, Square, etc.), and bank ACH funds transfers and wire transfers from external accounts, do not constitute Direct Deposit activity. There is no minimum Direct Deposit amount required to qualify for the stated interest rate.
SoFi members with Qualifying Deposits can earn 4.50% APY on savings balances (including Vaults) and 0.50% APY on checking balances. Qualifying Deposits means one or more deposits that, in the aggregate, are equal to or greater than $5,000 to an account holder’s SoFi Checking and Savings account (“Qualifying Deposits”) during a 30-day Evaluation Period (as defined below). Qualifying Deposits only include those deposits from the following eligible sources: (i) ACH transfers, (ii) inbound wire transfers, (iii) peer-to-peer transfers (i.e., external transfers from PayPal, Venmo, etc. and internal peer-to-peer transfers from a SoFi account belonging to another account holder), (iv) check deposits, (v) instant funding to your SoFi Bank Debit Card, (vi) push payments to your SoFi Bank Debit Card, and (vii) cash deposits. Qualifying Deposits do not include: (i) transfers between an account holder’s Checking account, Savings account, and/or Vaults; (ii) interest payments; (iii) bonuses issued by SoFi Bank or its affiliates; or (iv) credits, reversals, and refunds from SoFi Bank, N.A. (“SoFi Bank”) or from a merchant.
SoFi Bank shall, in its sole discretion, assess each account holder’s Direct Deposit activity and Qualifying Deposits throughout each 30-Day Evaluation Period to determine the applicability of rates and may request additional documentation for verification of eligibility. The 30-Day Evaluation Period refers to the “Start Date” and “End Date” set forth on the APY Details page of your account, which comprises a period of 30 calendar days (the “30-Day Evaluation Period”). You can access the APY Details page at any time by logging into your SoFi account on the SoFi mobile app or SoFi website and selecting either (i) Banking > Savings > Current APY or (ii) Banking > Checking > Current APY. Upon receiving a Direct Deposit or $5,000 in Qualifying Deposits to your account, you will begin earning 4.50% APY on savings balances (including Vaults) and 0.50% on checking balances on or before the following calendar day. You will continue to earn these APYs for (i) the remainder of the current 30-Day Evaluation Period and through the end of the subsequent 30-Day Evaluation Period and (ii) any following 30-day Evaluation Periods during which SoFi Bank determines you to have Direct Deposit activity or $5,000 in Qualifying Deposits without interruption.
SoFi Bank reserves the right to grant a grace period to account holders following a change in Direct Deposit activity or Qualifying Deposits activity before adjusting rates. If SoFi Bank grants you a grace period, the dates for such grace period will be reflected on the APY Details page of your account. If SoFi Bank determines that you did not have Direct Deposit activity or $5,000 in Qualifying Deposits during the current 30-day Evaluation Period and, if applicable, the grace period, then you will begin earning the rates earned by account holders without either Direct Deposit or Qualifying Deposits until you have Direct Deposit activity or $5,000 in Qualifying Deposits in a subsequent 30-Day Evaluation Period. For the avoidance of doubt, an account holder with both Direct Deposit activity and Qualifying Deposits will earn the rates earned by account holders with Direct Deposit.
Members without either Direct Deposit activity or Qualifying Deposits, as determined by SoFi Bank, during a 30-Day Evaluation Period and, if applicable, the grace period, will earn 1.20% APY on savings balances (including Vaults) and 0.50% APY on checking balances.
Interest rates are variable and subject to change at any time. These rates are current as of 8/9/2023. There is no minimum balance requirement. Additional information can be found at http://www.sofi.com/legal/banking-rate-sheet..
Financial Tips & Strategies: The tips provided on this website are of a general nature and do not take into account your specific objectives, financial situation, and needs. You should always consider their appropriateness given your own circumstances.
jQuery(document).ready(function()
jQuery(“.sharelink”).click(function(event)
event.preventDefault();
var url = window.location.href;
var hiturl=jQuery(this).attr(‘data-link’);
var link = hiturl + encodeURI(url);
window.open(link,’_blank’,’toolbar=0,status=0,width=626,height=436′);
);
);
–>
Corner walls, often dismissed as challenging spaces to decorate, hold immense potential to enhance the aesthetics and functionality of your home. With a little creativity and the right decor choices, you can transform these neglected areas into eye-catching features that reflect your style and personality. Whether it’s through shelves, artwork, plants, or innovative furniture, decorating your corner walls can breathe new life into your living spaces, making your home more inviting and visually appealing.
1. Floating shelves
Floating shelves are versatile and stylish additions to corner walls. Install a set of floating shelves in varying heights and display your favourite books, art pieces, potted plants, or decorative items. This not only adds visual interest but also provides storage and organizational solutions.
<!–
–>
2. Corner gallery wall
Create a captivating corner gallery by arranging a collection of framed artworks, photographs, or prints. Consider mixing various frame styles and sizes for an eclectic look. Ensure proper spacing and alignment for a polished appearance.
3. Corner plants
Introduce the beauty of nature into your home by placing indoor plants in decorative pots or planters in the corners. Plants not only liven up the space but also purify the air and create a calming atmosphere.
4. Corner shelving units
Corner shelving units or cabinets are designed specifically for maximizing corner spaces. These units provide ample storage for items like china, glassware, or decorative pieces while optimizing the use of otherwise wasted space.
5. Wall-mounted mirrors
Wall-mounted mirrors can make a room feel more spacious and reflective. Consider placing a large mirror on one of the corner walls to add depth and brightness to your space. You can also choose decorative mirrors to enhance the aesthetics.
6. Corner desks
For those in need of a home office or a study nook, corner desks are an ideal choice. A well-designed corner desk can fit seamlessly into your room, providing a dedicated workspace without taking up valuable floor space.
7. Corner lighting
Install wall sconces or pendant lights in corner spaces to add ambient or accent lighting. Properly placed lighting can create a cosy and inviting atmosphere while highlighting your decor.
8. Corner book nooks
If you’re a book lover, why not turn a corner wall into a cosy book nook? Install wall-mounted bookshelves and add a comfortable chair or cushioned seating for a perfect reading corner.
9. Wall decals and murals
Transform your corner walls into works of art by using wall decals or murals. These can add personality and character to your space without the permanence of paint.
Inside: Looking for the best travel essentials? Look no further! This guide has everything you need to pack for a trip.
There’s no feeling quite like the thrill of embarking on a new adventure, and with these top-notch travel essentials, your journey is set to be an absolute blast!
These travel essentials play a crucial role in not just enhancing your travel experience but also in keeping your trip organized, efficient, and absolutely “funner”!
Prepare to soar into hassle-free travel filled with joy, convenience, and unforgettable moments.
Many of my readers diligently save for their vacation and sometimes forget the small details like – travel essentials.
Traveling can transform from a stressful ordeal into an exciting escapade when armed with these must-haves that smart travelers swear by.
So, buckle up for an exhilarating journey ahead, knowing you’re perfectly prepared to take on the world. Let the adventures begin!
What are Travel Essentials?
Getting back to travel? Isn’t it just lovely!
Well, travel essentials are your new best friend! Waves of seasoned globetrotters have prepared this special guide for your benefit.
These items qualify as essentials because they streamline the packing process, afford comfort while traveling, and add a dash of fun to your adventures.
Also, there are so many cool gadgets available now that make traveling seamless.
What things are essential for Travelling?
Before you head off on the trip of your dreams, pack the right travel essentials to maximize your fun!
Meds: Don’t forget your prescriptions and common medicines for allergies or pain. Remember, health first!
Travel Insurance: Give yourself peace of mind by buying travel insurance – especially if you are traveling internationally.
Travel Credit Card: Credit cards are a simple way to pay when traveling. Make sure you have no foreign transaction fees!
Document Copies: Keep digital copies of essential documents to minimize panic and ensure quick verification in case of loss. And share this with someone in case you lose your phone!
Joyous journeys come from well-prepared travelers!
This post may contain affiliate links, which helps us to continue providing relevant content and we receive a small commission at no cost to you. As an Amazon Associate, I earn from qualifying purchases. Please read the full disclosure here.
What are 3 items to take on vacation?
Embrace the exhilarating aura of preparing for your much-awaited vacation!
Tuning into your needs and wants as a traveler, three crucial items stand out as top priority:
Anti-Theft Bag: This is an ideal travel companion – it comes with built-in security features that keep your belongings secure, reducing the risk of theft during your travels. With advancements in fashion, you can now find stylish options with exceptional functionality, making them perfect for vacations where style and security are priorities.
eReader: like the Kindle Paperwhite, makes the perfect vacation companion as it combines the portability and weightlessness of a single book while providing the capacity to store thousands of novels for entertainment. Moreover, its adjustable light settings and long battery life facilitate reading during transit, whether it’s mid-flight or at night, without disturbing others – a luxury traditional books can’t offer.
Tech Organizer Case: ensures all essential tech accessories like cables, adapters, and devices are neatly organized and easily accessible. This not only eliminates the hassle of rummaging through your bag for a tangled cord but also helps to maximize the efficient use of space within the bag.
Remember, the key is to pack smart and embrace savvy travel essentials that optimize comfort and convenience!
Best Travel Essentials Everyone Wants
Planning for a trip often entails the excitement-charged task of selecting the right essentials to pack.
This section highlights the best travel essentials that everyone craves, from the appropriate attire to tech gadgets, that go a long way in enhancing convenience during your journey.
These items, carefully curated by experienced travelers, promise to make every trip, whether short or long, a hassle-free experience.
1. Apple AirTags
Get ready for your next adventure with a travel essential that’s as smart as it is useful – the Apple AirTag.
This tiny gadget can make your trips stress-free by preventing the harrowing instances of lost luggage.
As a modern-day traveler, you’ll love the security it brings to your journeys. Simply sync the AirTag with your ‘Find My map’ and place it in your luggage to keep track of your belongings from point A to point B.
Lost luggage is increasingly common, but with an Apple AirTag, you’re covered.
Don’t forget these handy AirTag holders!
2. Travel Backpack
A travel backpack is your next must-have travel essential!
It’s an easy and convenient way to keep all your essentials – think wallet, phone, keys, passport – in one place, and with some even featuring a built-in USB port, you’ll never run out of battery on the move.
Its versatility and functionality, such as several compartments for organization and a separate section for shoes, are just unbeatable. Seriously, these travel backpacks are way cooler than your backpack from high school!
3. Luggage Scale
Traveling soon? Don’t even think about neglecting the trusty luggage scale!
This small but mighty tool, loved by frequent travelers like us, is your ticket to a stress-free journey.
With this compact gadget, say goodbye to dreaded overweight baggage fees.
Pack it in your carry-on for on-the-go convenience and weigh it with precision every time. One of my best gifts ever!
4. Anti-Theft Bag
An Anti-Theft Bag offers peace of mind when traveling, with built-in safety features deterring theft. These bags aren’t just secure but also fashionable, which is perfect!
The locking zippers act as a deterrent against potential theft as they add an additional barrier of protection.
Moreover, the incorporation of RFID blocking technology in these bags ensures your valuable information stays protected. This technology prevents identity theft by safeguarding any object with an RFID chip, such as passports issued after 2006 and credit/debit cards, from being read through your bag.
While traditionally, anti-theft bags have been seen as lacking in style, new versions of these bags are coming up in several fashionable options. As stated, they are now available in various colors like navy, charcoal, merlot, and blush apart from the usual black.
5. Underwater Action Camera
As a travel essentials superstar, the Underwater Action Camera ensures you never miss capturing a thrilling aquatic adventure. Turning ordinary snapshots into extraordinary keepsakes, this camera becomes a must-have for wanderlust souls.
Remarkably sealed, this camera captures stunning photos even from underwater.
Perfect for beachy holidays, and even more beneficial for snorkelers and swimmers.
Get for a tech-free vacation!
Pro tip: Master using this camera during daylight for better results.
6. Bluetooth Earbud Transmitter – Perfect to Use Your Airpods Pro
Head off on your next adventure armed with the Twelve South Bluetooth Audio Transmitter. This coveted travel essential turns your flight into a personal cinema!
Its superb features include high-quality sound transmission, pairing capabilities with airplane TVs, and functioning as a headphone splitter.
Ideal for tech-savvy travelers and those who love using their own headphones.
7. External Portable Charger
Don’t forget your portable charger – it’s a true travel hero! Imagine never running out of battery while navigating unfamiliar territories or capturing memorable moments.
This external power bank ensures your devices always stay juiced up.
Lightweight and compact size
Fast-charging capability
Can charge multiple devices at once.
Expert tip: Choose a charger that can power your device type at least 4x from zero battery.
8. Lightweight Luggage
Investing in lightweight luggage helps travelers avoid excessive baggage fees.
This is what we did over ten years ago and I can truly say we have saved thousands of dollars.
Look for luggage that weighs less than ten pounds. With most airlines capping luggage weight between 40-50 pounds that gives you 30-40 pounds of your stuff that you can pack.
While it is an upfront investment in new luggage, you will significantly reduce the risk of incurring additional fees.
9. Travel Wallet
This is something I picked up right before my last flight (teal of course)! I loved it because it was lightweight and compact size for easy carrying. Even in my yoga pant pocket!
Heald exactly what I needed with organized compartments for ID, cash, and credit cards
Sleek design that suits any style
RFID protection to keep your information safe
Travel wallets are perfect for minimalist travelers who love simplicity and security.
Learn how much cash can you fly with. It is more than your travel wallet!
10. Passport Holder
A passport holder: the travel essential you never knew you needed.
It’s the perfect companion for safeguarding your most priceless travel accessory – your passport.
Super convenient, passport holders come equipped with slots for important IDs, boarding passes, and even stashed currency.
The RFiD-blocking feature ensures your personal details remain secure from potential scams.
If you are traveling internationally, then this is something you want to seriously consider.
11. Tech Organizer Case
It’s a must-have to neatly stash all your tech essentials. Never be frazzled by tangled cords or lost chargers again.
The Tech Organizer Case, like the top pick FYY Electronic Organizer, is your ultimate travel buddy ensuring a clutter-free trip.
Ample space for multiple chargers, durable, and easy-to-use zippered compartments.
Be the organized traveler everyone envies!
12. Portable Door Lock
You mustn’t miss out on the Portable Door Lock when packing your travel essentials! This compact lock adds top-notch security and peace of mind to your trips.
Portable door locks are hot on the list of travel essentials because of their simplicity – easy to use, install, and pack in your luggage.
Best for solo travelers and Airbnb guests, this device prevents unexpected entrance even with a key.
Pro tip: Always test the lock right after installation for foolproof safety.
13. Carry-On Rolling Luggage
With precise packing, it is feasible to fit everything you need into this one carry-on, thereby ensuring a seamless travel experience.
Picking the best carry-on rolling luggage for your needs requires careful consideration. Rolling luggage with 4-wheels can be ideal as it takes the weight off your wrist and can be rolled effortlessly by your side.
Spacious enough to accommodate all your travel essentials like laptop, shoes, etc.
Opt for brands that offer a good warranty to ensure the durability of your luggage.
If your travel involves different types of terrain or switching from airports to cobblestones, you might want to consider a wheeled backpack which can be rolled or carried as needed. Lastly, always ensure that your chosen luggage is lightweight, versatile, and
These suitcases not only provide convenience due to their mobility but also allow the freedom to avoid checked luggage.
14. Toiletry Bag
Toiletry bags have become an essential part of smart packing for travel.
Hanging toiletry bags, like the Bagsmart option, represent a game changer, contributing significantly to an organized, convenient, and hassle-free travel experience.
Pick one that has the ability to accommodate a week’s worth of travel-size toiletries.
15. Travel Duffel Bag
Whether it’s a long adventure or a weekend getaway, a travel duffel bag is incredibly useful.
It holds your essentials—clothes, tech gadgets, toiletry bag, keys, phone—safely and conveniently.
Remember the thrill of keeping all your belongings organized? You get that with the multiple compartments.
Also, let’s not forget about that separate section for shoe storage—talk about clutch!
Best feature? Some come with a built-in USB port to ensure your devices are always charged.
Expert tip: Look for a bag that’s airline-compliant, lightweight, and durable.
16. Travel Pillow
Ready for your next adventure? Don’t forget your travel pillow – it’s your key to ultimate comfort!
Many popular Travel Pillows offer tailor-made support for your head and neck, especially on those long-haul flights. It’s lightweight and packs easily, meaning less hassle for you.
Best for those who value a peaceful in-flight snooze, this game-changing essential comes with a memory-foam wall offering unmatched comfort.
Pro Tip: Pair it with the EverSnug travel blanket, It doesn’t just keep you cozy but doubles as a compact cushion too! Now, that’s travel made comfy and convenient!
17. Sunglasses Case
Off to a sun-soaked adventure, you need a nifty sunglasses case! It’s a must-have to safeguard your shades from damage while in transit.
Perfect for those eyeing to pack multiple pairs of sunglasses, you’d love this.
Expert tip – Choose a case that securely holds your glasses snugly, ensuring no damage takes place during the journey.
18. Contact Lens Case Kit
After my last late night flight, I was determined to find a better system for my contact. Enter the Contact Lens Case Kit.
Perfect for maintaining your vision care away from home, this kit boasts a mirror, mini solution bottle for your contacts, lens case, tweezer, and remover tool.
You can also get a contact lens and glasses case combo travel kit!
This handy, compact kit is an asset to anyone wearing contacts. Not only will it make your travel simpler, but it’s also affordable, priced under $10.
19. Reusable Water Bottle
Set off on your travels with the ultimate companion, a reusable water bottle!
Refill at any airport water fountain and save on plastic and expenditure – a savvy choice for our planet and wallet!
Plus this is a frugal green item with less plastic waste and sustainable hydration.
Expert Tip: Pack Liquid IV or Nuun tabs to make your drink a fun experience!
20. Packing Cubes
Say goodbye to disorganized luggage with packing cubes—your best travel buddy!
They’re a lifesaver for the frequent flyer seeking an organized and hassle-free travel experience. Especially those traveling with kids!
With features like shoe sleeves and compressibility, they’re ideal for chronic over-packers or shared-luggage travelers. I cannot say how helpful packing cubes are for trips!
21. Luggage Straps
Luggage straps are a travel essential you shouldn’t overlook! These handy accessories offer added security and ease for every traveler.
Designed with durability and convenience in mind, luggage straps, such as the TSA-approved luggage nylon straps, keep your checked bags secure during long flights. You’ll also love their visibility feature – bright neon colors that make your suitcase easily identifiable!
Ideal for people frequently on the go, they’ve garnered solid endorsements from seasoned travelers.
22. Travel Pill Box
Say goodbye to loose pills and experience medication portability at its finest with the Travel Pill Box – a real game changer for travel essentials!
The sheer convenience it offers makes it a must-have for every traveler.
The Travel Pill Box keeps your medications organized with multiple compartments that can be labeled as you wish.
Ideal for people on the go, it eliminates the need for bulky pill boxes and plastic bags.
Expert Tip: Allocate distinct sections for different medications and times of the day to ensure regularity even when your travel schedule is unpredictable.
23. Universal Travel Adapter
This top-quality adapter is a jet-setter’s delight, ensuring you’re always powered up on your globe-trotting adventures.
A travel adapter is a useful device that allows travelers to use their electronic devices in countries where different plug standards are used. It provides a hassle-free way to keep electronic devices like laptops, phones, or cameras powered up, vital for staying connected and entertained during international travels.
With its functionality in over 150 countries and capacity to charge six devices simultaneously, it’s perfect for the tech-savvy traveler.
Remember, it’s not a voltage converter, so ensure your devices are dual-voltage. If not, pack an adapter that converts voltage.
24. TSA Approved Luggage Lock
Secure your luggage with the TSA Approved Luggage Lock, an absolute must-have for every savvy traveler.
With this lock, enjoy peace of mind on your journeys, assured your luggage is safe and no one has been through your stuff!
Featuring easy-to-read dials, an inspection indicator, and a durable zinc alloy design, it’s perfect for frequent flyers and security-conscious travelers.
Expert Tip – Always lock your suitcase when unattended to deter theft. And carry an extra in case yours is lost.
25. TSA Approved Travel Bottles
These TSA Approved Travel Bottles are magnificent game-changers for any frequent flier.
They’re precisely designed, with an easy dispensing mechanism, and leak-proof tops, plus conform to TSA size limits.
A supreme choice for savvy travelers, they’re reusable, eco-friendly, and wallet-friendly.
26. Luggage Cup Holder
The Luggage Cup Holder is about to be your new jet-setting best friend. (In fact, I’m buying this for my son for Christmas.)
This genius accessory deftly holds your coffee or water bottle, freeing you up to maneuver through busy airports effortlessly.
Even better, it features a handy pouch for storing essentials like ID’s or credit cards.
Juggle less and travel more, with this brilliant travel necessity!
27. Compression Socks
Long-haul flights call for compression socks! They increase blood flow while reducing swelling and the risk of blood clotting which may occur due to prolonged periods of sitting, such as during long flights.
Thankfully, they are way more stylish than the traditional hospital-issued white compression socks. This has caused their popularity to soar, providing pressure from the ankle upwards, making them essential for flights.
These socks provide graduated compression especially high at the ankles and reduce upwards towards the knee, facilitating increased blood flow.
Moreover, they are not only meant for those with medical conditions, but also beneficial for travelers, athletes, and those who stand for long hours at work. They enhance overall leg health by minimizing swelling, fatigue, and discomfort, thus improving the quality of your daily activities and sleep.
28. Cruise Luggage Tags
Get ready to sail in style and convenience with one indispensable travel essential – cruise luggage tags.
It’s that little gadget you never knew you needed until you’ve used one and seen its magic.
Here’s why: These tags make your bags unmistakable, reducing the risk of losing them amidst a sea of sameness. It’s a godsend for frequent cruisers as your company-issued tags won’t fall off.
Go for brightly-colored, durable tags. A simple trick, but could save you from a world of lost luggage stress.
29. Laundry soap sheets
One of the best ways to pack less is to run a quick load of luggage on your trip. So, these laundry soap sheets come in handy! We also pack two dryer balls as well.
Ready to pack for your next adventure? Don’t forget laundry soap sheets, a travel game-changer! –
They’re lightweight and occupy minimal space. This is great when packing a minimalist capsule wardrobe.
No time to find a laundromat? Then, use SinkSuds which can be used anywhere!
30. Security Cameras at Home
Securing your home with surveillance cameras while traveling is a crucial precaution.
The peace of mind offered by a vigilant “electronic eye” is incomparable. These cameras capture real-time footage, aiding in deterring burglaries and providing evidence if needed. Perfect for frequent travelers, it assures your abode’s safety from afar.
When we travel, we install one inside our house with an instant notification on our phones. As motion is detected, a siren noise goes off, which I’m sure would terrify any intruder!
Expert tip: Opt for cameras with remote-access features, so you’re always a glance away from your home.
What are the five most important items you need for these vacations?
Setting off for your much-anticipated vacation?
Here are the top five must-have travel essentials for an easy-going and memorable adventure.
Travel Planner and Journal: This bundle is essential for planning your trip and keeping track of your daily activities. The planner helps organize your itinerary, while the journal provides a wonderful means to record memories and experiences from your trip.
Multipurpose Clothing: Items like versatile shoes or pants that are ideal for multiple activities such as hiking and sightseeing are crucial to pack. Such items can save you space in your baggage, simplify your travel outfits, and cover a variety of travel occasions or activities.
All-in-One Travel Bag: A multipurpose bag, like a fanny pack or backpack, is an important versatile travel essential. This item keeps your essentials within easy reach, aids organization, and can adapt to a variety of travel situations.
Personal Care Essentials: Depending on your destination and planned activities, personal care items may include sunblock, moisturizer, or insect repellant. They ensure you are prepared for the environmental conditions you may face and can greatly enhance your overall comfort and well-being during your travels.
Travel Luggage: This trendy luggage piece thrills travelers with its durability and sleek design. Make sure your suitcases are lightweight!
Remember, a well-prepared traveler is a happy traveler. Aim for comfort, protection, and convenience!
Which Essentials for Travelling are your Next Purchase?
Ready to embark on your next adventure?
Don’t let unexpected situations curb your enthusiasm – it all starts with being prepared.
Remember, travel isn’t just about the destination but the journey, and the journey includes packing well!
With these travel essentials ideas, you can load up your bags with high-quality travel gear, ensuring comfort and stress-free experiences during your trip and beyond. Many of which are actually Amazon travel must haves.
Investing in essentials now will not just save you money down the line, but also help avoid irritating travel hitches.
Whether it’s tangle-free cords, smart luggage, or convenient packing tools – each item on our list has earned its spot by proving its worth on countless journeys for me.
So, next time you’re planning a trip, remember to refer back to this list. Good preparation equals to great journeys!
Know someone else that needs this, too? Then, please share!!
Home is where we spend most of our time, the safe space that welcomes us at the end of a long day, the special place where we raise our families, bond with our loved ones, or retreat to for some well-deserved solitude.
And much like everything else in life, our home needs to be properly taken care of. I’m not talking about property improvements, upgrades or anything fancy.
Today, we just want to go over some general home maintenance aspects that you’re likely well aware of, but we’re hoping that a little reminder will help bring them to the forefront.
There are many things you can do, from doing regular maintenance with proper cleaning products like the ones from HG to taking extra safety measures. When you take care of your home properly, it will be the most comfortable place in the world. Keep reading to learn more about how you can achieve that.
Perform regular maintenance
The first tip to make your home is always in top condition is to perform regular maintenance.
This usually includes inspecting some points in your house, such as pipelines, roofs, ceilings, and HVAC systems. When you find something wrong at one or some of those points, you have to quickly address the issue.
Of course, you can always rely on professionals who are specialized in fixing such problems if you don’t feel like you have the expertise to do it yourself.
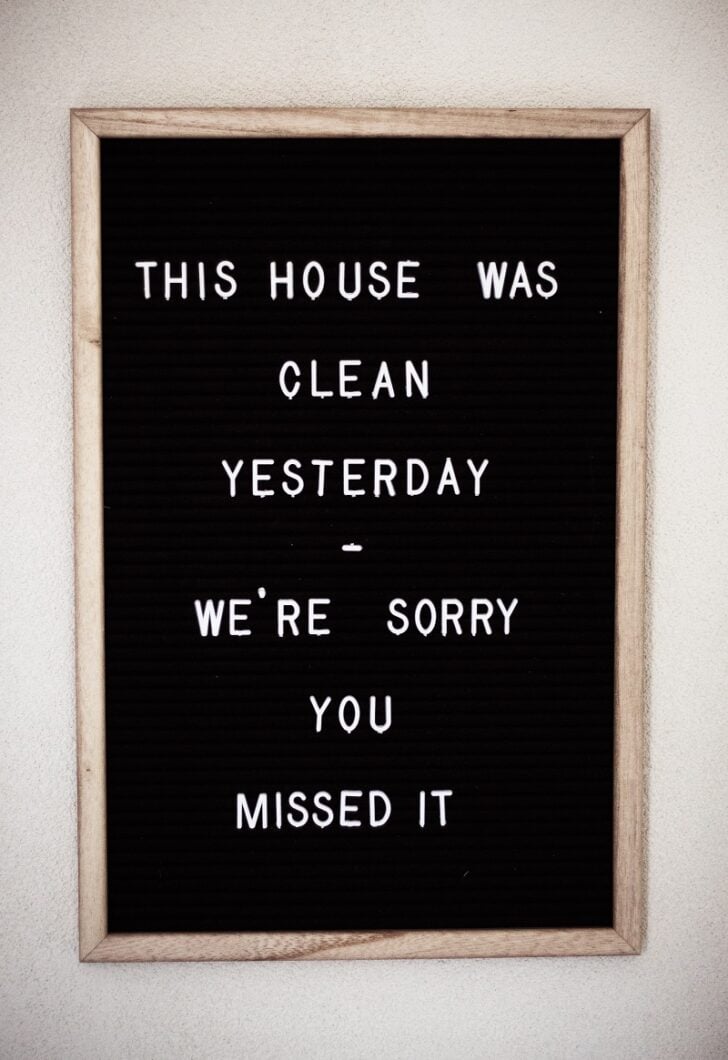
Make a regular cleaning schedule
The next tip is to keep your house clean at all times by making a regular cleaning schedule.
You can set the cleaning schedule once a month, twice a month, or even once a week depending on how often your home gets cluttered. Usually, the more people living in the house, the more easily it gets cluttered and accumulates dust.
Photo by Josue Michel on Unsplash
You can adjust your regular cleaning schedule based on how many people live in your house. Besides, you have to stock up on several kinds of cleaning products to make your regular cleaning activities much easier.
Take security measures
Another thing you must not miss when taking care of your home is to take security measures.
This is very important because the safety of your house as well as its inhabitants must be a key priority. And this doesn’t only mean safety from burglars who can break into your house. It also means keeping your home safe from hazards such as fire and potential short circuits.
A few easy ways to achieve this is to ensure your home has all the basic security features like security locks, smoke detectors, and fire extinguishers. It’s also a good idea to install an alarm system and several CCTVs around your home (if your budget can accommodate that) to make it more secure.
Photo by Sebastian Scholz (Nuki) on Unsplash
Perform landscaping and outdoor maintenance regularly
To make your home more comfortable and aesthetically pleasing, you have to perform landscaping and outdoor maintenance regularly.
This is very important because the exterior of your house can change drastically if you don’t tend to it regularly. One of the most important outdoor maintenance activities that you have to do is to mow your lawn due to how fast weeds grow.
You also have to trim bushes and trees if you have any in your yard. You also have to check the drainage to make sure it’s not blocked by dirt.
More stories
7 Top Decorating Ideas for Your Bedroom this Fall: Making Your Room More Cozy & Stylish
Here’s Everything You Need to Set Up a Meditation Corner in Your House
10 Unique Picture Frames and Holders to Create the Perfect Photo Wall
Inside: Are you looking for a way to help your kids learn about money? If so, Cash App for kids is the ideal answer. This guide will teach you how to manage money simply by using apps.
Ever wondered why it’s crucial for your kids and teens to have a cashless payment option?
In this digital age, teaching money management skills early to our younger generation is vital.
Having features likeCash App for kids is a great way to introduce them to responsible spending. Not only does it provide a secure method for purchases without the need for carrying physical money, but it also serves as an excellent tool for setting spending limits and tracking budgeting habits.
Plus, it’s a win-win for parents and teens as you can visually monitor transactions while they enjoy a sense of financial independence.
This post may contain affiliate links, which helps us to continue providing relevant content and we receive a small commission at no cost to you. As an Amazon Associate, I earn from qualifying purchases. Please read the full disclosure here.
What is Cash App?
Cash App is a user-friendly financial services platform that allows users to instantly send, receive, and invest money.
It offers a range of services including a free custom Visa debit card and the option to receive paychecks up to two days earlier.
Additionally, with the Cash App, users can instantly buy and sell stocks commission-free and even trade in bitcoin.
Can a child have Cash App?
Yes, a child can have a Cash App account if they are 13 years old or older. However, it requires parental approval.
Remember, this gives your child the opportunity to learn money management, but it also comes with the responsibility of overseeing their spending.
Why would kids need Cash App?
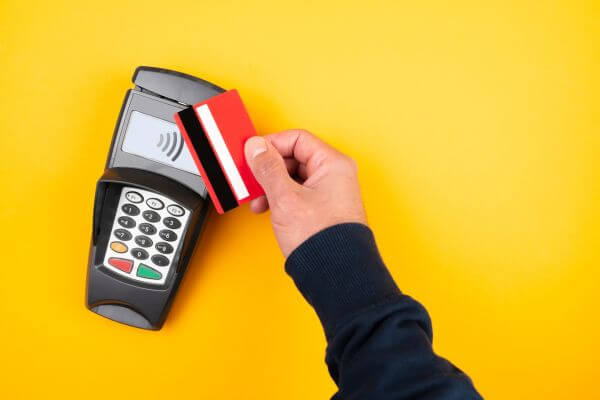
Well, we are moving to a cashless world. There are thousands of stores and restaurants that only offer cash. We learned this when our son went to an MLB baseball game with his middle school. No cash. Only debit or credit cards were accepted as well as Visa gift cards.
So, we needed to give our kids an introduction to modern, simple, and secure ways of money management.
Cash App might be the perfect solution. Another great option is Greenlight for kids.
Cash App – Do More with Your Money
Cash App is a user-friendly financial services platform that allows users to instantly send, receive, and invest money.
Simple way to save on everyday spending and back the way you want.
What are the benefits of using Cash App for kids?
Education: Cash App can be an effective way to teach your children about responsible money handling and the dynamics of a digital economy.
Control: You have the flexibility to set spending limits and disable certain features, ensuring responsible use of the application.
Security: Cash App’s encrypted connection adds an extra layer of security, keeping your kid’s transactions and personal data secure.
Emergencies and convenience: It’s an incredibly handy tool for sending cash to your kid during emergencies. No need to rush, just a tap on your phone, and you can send money.
What cash apps can 13 year olds use?
In today’s cashless society, it’s more important than ever for kids to learn how to manage money digitally.
Below are some alternatives to Cash App that serve well for 13-year-olds:
Description:
The Greenlight debit card is a kid-friendly financial tool designed for comprehensive money management education.
Parents can monitor and control card usage, set spending limits, and track your child’s spending and saving habits.
Learn to earn, save, and invest together. The banking and investing app for kids and teens.
Comes with a debit card
Allows kids to make savings goals.
Limited deposit methods
Monthly fee
Starts at $4.99/month
Description:
Prepaid cards and a family finance app for kids, teens, and parents.
More than money.
A financial education.
If you want your child to learn money habits that match your values, you’re in the right place.
Description:
Cash App is a user-friendly financial services platform that allows users to instantly send, receive, and invest money.
Simple way to save on everyday spending and back the way you want.
Description:
The Greenlight debit card is a kid-friendly financial tool designed for comprehensive money management education.
Parents can monitor and control card usage, set spending limits, and track your child’s spending and saving habits.
Learn to earn, save, and invest together. The banking and investing app for kids and teens.
Comes with a debit card
Allows kids to make savings goals.
Limited deposit methods
Monthly fee
Starts at $4.99/month
Description:
Prepaid cards and a family finance app for kids, teens, and parents.
More than money.
A financial education.
If you want your child to learn money habits that match your values, you’re in the right place.
No bank account needed.
No fancy phone needed.
Affordable for all! Plus free trial!
Mobile setup is not user friendly.
No investing option.
$5.99 month or $3.33/month for 12 months
Description:
Cash App is a user-friendly financial services platform that allows users to instantly send, receive, and invest money.
Simple way to save on everyday spending and back the way you want.
Only able to spend what is loaded on Card.
Free CashApp debit card.
No maintenance or annual fees.
Not FDIC insured.
No parental controls.
Remember, each app has its own unique strengths and weaknesses. Do some research and try out a few to see which one best suits your teen’s financial needs.
How do I create a Cash App account for my child?
Teaching kids about money management is vital for their financial future.
One excellent way to do this effectively is by setting up a Cash App account for children, giving them practical experience in handling finances while under a parent’s supervision. Also, known as a sponsored account.
This guide will walk you through the process of creating a Cash App account for your child and highlight the numerous benefits it offers.
Step 1: Download Cash App
To download Cash App, click this Cash App link to make sure you are in the right spot. Both you and your teen will need to do this step.
It’s easily recognizable – look for the white dollar sign on a green background. Once you’ve found it, simply hit ‘Install’ and sit back while your phone does the work.
Remember, this green goodness is only accessible to users in the United States.
When learning which payment type is best when trying to stick to a budget, you will be pleasantly surprised at how well Cash App works.
Step 2: Create an Account
This is a simple process. Both the teen and the adult will need to do this step separately. If as the parent you don’t have a Cash App account, then you will need to do this step.
To create a Cash App account, follow these steps:
Once installed, open the application and follow the on-screen instructions to set up your account.
You will have to enter your phone number or email address.
For security certification, the Cash App will send you a secret code to verify you. Enter it.
Select a $cashtag, which is a unique username to send and receive money (similar to Venmo)
Step 3: Connect a Bank Account
For the parent account, you need to complete this step and the teen will need to wait.
Remember, in “My Cash” you’ll spot the “Add Money” option for funding.
Open Cash App; it’s the icon with a white dollar sign on a green background.
Tap the top-right profile icon.
Navigate to “My Cash” – it’s a tab on the home screen.
Click “Link a Bank,” nestled within the options.
Follow the prompts to add your bank account or debit card info.
Once your card is linked, you’re all set.
Learn where can I load my Cash App card.
Step 4: Authorization Request of a Family or Sponsor Account
Now, you must link the two accounts together. Cash App calls this a sponsored account. There are one of two ways to accomplish this.
Option #1 – Parents Initiate the Request
To invite someone 13-17, then open the app:
Tap the Profile Icon on your Cash App home screen
Select Family
Tap Invite a teen
Follow prompts to share links using text or email
Option #2 – By the Teen
On the Home Screen, tap the Cash App profile icon.
Proceed to Family Accounts and choose the option “I’m a Teen”.
Complete the Cash App for Kids application form with your details including your name and birthday.
Hit the Request Approval button.
Enter the name, email, phone number, or $CashTag of your parent/guardian.
Lastly, tap Send. This will send an authorization request to your parent or guardian’s Cash App account. They need to approve this request before you can start using the app.
Note: You can’t add funds, send payment, or request a Cash Card until this authorization is approved.
Step 5: Have Your Child Design and Order a Free Cash Card
Now, the fun part! Ordering your own Cash App Card.
Designing and ordering your Cash Card is packed with creativity and ease.
Customize your card to represent your unique personality, with choices ranging from the material, font size, and base design, to text lines.
You can seek inspiration from an array of cool Cash App Card design ideas. Notably, the glow-in-the-dark cards are quite popular among minors.
The whole process is about making your debit card unmistakably yours.
Step 6: Limitations on Certain Features
Certain financial apps cater to teens by setting limits on transactions.
For example, a teen on Cash App can send and receive up to $1,000 every 30 days. This safeguard is designed to prevent overspending and encourage smart budgeting practices.
Furthermore, parents and guardians have the option to impose their own customized spending limits through the app according to their teen’s financial maturity. However, it’s essential to keep in mind, that these apps are not recommended to be used by teens just like regular accounts due to the risks of misspending and overspending.
Be aware that certain transactions are blocked, including bars, dating services, and rental car services
Encourage your kids to use robust, unique passwords and activate features like PIN lock and facial ID to enhance security.
You can ensure safety by setting a PIN, turning on notifications, and limiting money requests to ‘contacts only’.
This is similar to understanding the advantages of mobile phones for kids.
Step 7: Pick a unique $Cashtag
Tell your child to select a unique and fun $Cashtag for their Cash App account. It’s like a username and can be used in transactions.
Emphasize the originality of the $Cashtag as it needs to be unique.
Expert Tip: To secure their $Cashtag, avoid using personal information like birthdate or social security number. Instead, opt for quirky, fun, and uncommon word combinations.
Step 8: Send & receive money
Cash App provides an easy-to-use platform for instantly transferring money between friends and family at no cost.
A few quick taps allow users to request, receive, or send money, presenting a convenient method for paying a dinner, settling rent with roommates, or any other financial interactions.
In addition, users get a free custom Visa debit card, which they can order directly from the Cash App for both virtual and physical use. The card enables users to make purchases from any merchant accepting Visa cards.
Plus, with the Cash Boost feature, users gain from immediate discounts at select restaurants, stores, applications, and websites when they use their Cash App card.
An Alternative – Use Greenlight Debit Card for Kids
Looking for an all-in-one alternative to the Cash App for your kids?
Explore the Greenlight Debit Card for kids – a superb choice for money management and financial education.
The Greenlight debit card is a kid-friendly financial tool designed for comprehensive money management education.
Parents can monitor and control card usage, set spending limits, and track their child’s spending and saving habits.
Plus it offers 1% cash back on all purchases and up to 2% interest on savings, this card is accepted anywhere MasterCard is used and comes with built-in features that include educational programming and real-time notifications for every transaction.
Greenlight
The Greenlight debit card is a kid-friendly financial tool designed for comprehensive money management education.
Parents can monitor and control card usage, set spending limits, and track your child’s spending and saving habits.
Pros:
Offers a comprehensive financial education pathway
Broad acceptance due to affiliation with Mastercard
Parents retain control over spending limits
Real-time notifications improve security
Cashback rewards are an added bonus
Cons:
Greenlight charges a monthly fee starting from $4.99
Limitations on direct deposits
No possibility for payments from Paypal, Venmo or Apple Cash
Kids under 13 require parental access
Some transaction types are blocked
It’s an innovative and secure financial platform for kids, with plans starting at $4.99 a month.
Safety Measures for Using Cash App for Kids
Educating children about safety measures while using cash apps and debit cards is crucial in today’s digital age.
With increased online scams, it’s important that kids understand the equivalence of digital cash to real money and how to protect their accounts.
This brief overview will highlight key practices to ensure your child’s safety when handling digital transactions.
1. Know the App’s Safety Features
Knowing the app’s safety features is crucial for maintaining security while using cash apps.
These features can include password protection, two-step verification, and biometric scans such as fingerprint or facial ID. Many apps also offer robust encryption to secure data and transactions.
Keeping abreast of the app’s safety protocols not only helps safeguard against potential scams but also instills a better understanding of digital literacy. Understanding these safety measures and functionalities can greatly lessen the likelihood of falling victim to fraudulent activities.
Make sure they don’t learn how to unlock borrow on CashApp!
2. Talk to Your Kids About Money
It is essential to talk to your children about financial literacy from an early age especially if your parents never spoke about money.
Start by making them aware of the concept of saving by using tools like a piggy bank and elucidate the value of delayed gratification.
As they mature, introduce them to the functionalities of debit cards and apps like Cash App that provide hands-on experience in managing finances. Teach them about budgeting, saving, and investing in an age-appropriate manner.
Above all, impart the message that money doesn’t just grow on trees and that every purchase needs to be evaluated against future needs and plans.
3. Use Account Alerts to Stay Up to Date
Account alerts on Cash App are not only handy but critical to your kid’s financial safety. Setting them up is a breeze.
Firstly, head to the “Notification” tab in your app settings.
Thereafter, opt for “Account alerts” and switch it on. This will ensure you’re notified of all transactions.
For an added layer of security, enable “Suspicious activity” alerts; this helps to flag any odd movements swiftly.
4. Set Up a Strong Account Passwords
It is crucial to ensure that your online accounts are secured with robust and unique passwords.
Complex passwords that incorporate a mix of uppercase and lowercase letters, numbers, and special characters can provide a strong line of defense against unauthorized access. Also, you should look at changing these passwords regularly, which further enhances security.
Using a password manager, either online or paper-based, can assist in maintaining and keeping track of different account credentials, maximizing security while minimizing the risk of forgetting passwords.
However, if opting for a paper-based version, it is crucial to store it in a secure and confidential location to prevent unauthorized access.
5. Have a Conversation About Scams and Fraud
The proliferation of digital transactions and cash transfer apps has given rise to numerous scams, making it critical for users to look out for fraud.
Online scams can result in financial loss, with cash apps often not assisting in the recovery of misdirected funds due to errors or fraudulent activities.
Additionally, cybercriminals use these scams to steal personal data, leading to issues like identity theft and fraudulent transactions. Furthermore, the anonymity of digital platforms enables scammers to disappear without a trace after executing a scam, sometimes befriending and exploiting minors.
Therefore, everyone must stay vigilant about potential scams to protect their money, personal information, and overall digital safety.
Key Tips to Watch for:
Discuss current scams happening. Use reliable resources to educate them about how fraud works and precautions to take.
Teach them to *slow down* during transactions to avoid sending money to the wrong contacts.
Advise against sending money to strangers to avoid being scammed.
6. Check Bank Accounts for Any Unauthorized Payments
As a parent, it is essential to regularly check your teen’s checking accounts linked to their mobile wallet for unauthorized payments.
By staying vigilant, you can detect suspicious activity early and prevent possible instances of fraud.
Tracking their spending patterns also helps you understand if they are managing their digital money wisely or if there are sudden changes in their spending habits.
Remember, it is better to be proactive in monitoring these accounts, as most money transfer app funds are not FDIC insured, making the recovery of accidental transfers or payments a challenging task.
7. Ability to Give Your Kids an Allowance
If you choose to do so, giving your kids an allowance on Cash App is a safe and effective way to teach them about responsible money management. It provides hands-on experience while putting the power of monitoring in your hands.
To set this up, simply create an account for your minor and periodically send money to it as an allowance. They can spend or save it, while you observe their spending habits.
This is a simple way for kids and teens to start managing a small amount of money.
Cash App – Do More with Your Money
Cash App is a user-friendly financial services platform that allows users to instantly send, receive, and invest money.
Simple way to save on everyday spending and back the way you want.
Which cash app will you choose for your kids
To sum it up, equipping your kids with financial responsibility via Cash App or Greenlight is an intelligent move.
These apps provide a platform for learning about savings, investments, and the value of money.
Although risk exists its potential scams, with proper guidance, your teen can safely navigate this. The added perks of trading, direct cash exchanges, and options like BusyKid and Bankaroo can further enrich their financial literacy journey.
So, which digital wallet will you pick for your kid’s first leap into financial independence?
Know someone else that needs this, too? Then, please share!!
I use a very similar system under my bathroom cabinet: the area is vertical enough that my bottles and things don’t reach to the top, but that leads to wasted storage space above them (because I can’t safely stack on them, and even then, I wouldn’t be able to actually see them). So I use the Command heavy duty caddy for stashing small things, like extra toothbrushes and floss, in the upper right! Works like a charm, and has held up for the five years since I moved in.
Promising review: “For the price and the look I think it’s a good buy. It’s easy to install — has simple set up to screw into the wall and know that its secure. Looks great, blends with almost everything. This could be used literally anywhere, bathroom, kitchen, laundry, bedroom above your night stand, as organization throughout the house, endless possibilities. These look great and can hold enough without having to tear up your wall w a shelf or extra mounting hardware. As it stands, it’s a good price and made of great quality.” —Lauren A
Get a wire version from Amazon for $12.88+ (available in two colors and four styles).
You’ve probably used Venmo a lot this past year, but is Venmo safe? And if so, what are the advantages of Venmo over other online payment providers? Read answers to these questions and more in our helpful guide below.
In This Piece
What Is Venmo?
Venmo is a type of peer-to-peer—or person-to-person—payment app. Its parent company is money-moving giant PayPal, which had over 377 million registered users in the last quarter of 2020. Think of Venmo like “PayPal lite”—you can receive cash and send money to people, but you can’t send invoices or do anything complex.
PayPal launched Venmo for one reason—to compete in the P2P payment marketplace. Not everyone needs PayPal’s full suite of services, but they appreciate a convenient way to split the bill. You can pay for part of a dinner or your share of the shopping with Venmo, and some online retailers also accept Venmo as a form of payment.
Venmo began offering a cash back rewards debit card—the Venmo Debit Card—in 2018. In late 2020, it launched the Venmo Credit Card. Like the Venmo Debit Card, the Venmo Credit card offers cash back—up to 3% on your “top spend” category.
How Does Venmo Work?
Venmo works a little like PayPal. To use the services you simply:
I just watched a documentary on the dark web, and I will never feel safe using my credit card again!
Luckily I don’t have to worry about that. I have ExtraCredit, so I get $1,000,000 ID protection and dark web scans.
I need that peace of mind in my life. What else do you get with ExtraCredit?
It’s basically everything my credit needs. I get 28 FICO® scores, rent and utility reporting, cash rewards and even a discount to one of the leaders in credit repair.
It’s settled; I’m getting ExtraCredit tonight. Totally unrelated, but any suggestions for my new fear of sharks? I watched that documentary too.
…we live in Oklahoma.
Download and install the app on your phone
Link the app to your bank account, debit card, or credit card
Begin sending payments to friends, family members, and select online retailers
Venmo has an initial $299.99 weekly sending and receiving limit. To lift that limit, you need to provide identification documents. Once your ID is confirmed, you’ll have a $4,999.99 weekly limit.
If you want a Venmo Debit Card, you’ll need to apply online. To get a Venmo Credit Card, you need to be over 18 and a U.S. resident—and you also need to have had your Venmo account for at least 30 days.
Is Venmo Safe? What Are the Risks of Using Venmo?
Venmo is generally very safe—the company uses bank-level encryption to keep your data safe. You can add a PIN number and enable multi-factor authentication (MFA) to make your account even more secure. A strong password combined with a PIN and MFA greatly reduces the chance of hacking.
Venmo’s default profile and payment settings are public. Thankfully, you can change your privacy settings to keep your payment settings under wraps. Venmo’s three privacy levels are:
Anyone can find you and see your transactions.
Only you and the person you send payment to will see a transaction.
Friends only. Your Venmo friends can see you and can also see your transactions.
You can set your privacy settings to default to any of these three levels, or you can set levels on a transaction-by-transaction basis. You can also hide your past transactions.
Is Venmo Free?
Depending on how you use Venmo, it can be 100% free. Believe it or not, if you’re strictly using Venmo to transfer payments from one party to another and you’re not using a credit card, you may be able to use it for free.
However, there are some instances where Venmo does charge a fee. For example, if you’re using Venmo as part of your business, you’ll likely need to pay merchant fees. Here’s a look at the various fees Venmo charges account holders.
Instant Transfer Fees
You can transfer money from your Venmo account to your bank account at any time. This process can take 1-2 days to complete. If you need the money faster, you can opt for the instant transfer option, but it will cost you. Venmo charges an instant transfer fee of 1.75%, with a minimum fee of $0.25 and a maximum fee of $25.
Processing Fees
If you choose to make a Venmo payment using your bank account or debit card, you’ll incur no additional fee. If, on the other hand, you use a credit card to make this payment, you must pay processing fees. Venmo’s processing fees are 3%.
Check Deposit Fees
Venmo allows account holders to deposit checks directly into their Venmo account. However, it charges a fee for this service. The check deposit fee is 1% or a $5 minimum when depositing government-issued or payroll checks and 5% or a $5 minimum when depositing all other checks.
Merchant Fees
If you’re using Venmo to accept payments for a business you operate, you must pay merchant fees. Venmo charges business owners a 1.9% merchant fee plus an additional $0.10 per transaction.
What Is Venmo Debit Card and How Does It Work?
If you use your Venmo account quite often or have your payroll or government check deposited into your Venmo account, you might want to consider applying for a debit card with Venmo. This card is similar to any other debit card from a financial institution. It lets you spend the money in your Venmo account anywhere that accepts debit cards.
You can track your deposits and payments directly on the Venmo app, and you can also check the balance in your account. Since this is a debit card, it doesn’t have the same strict credit requirements you might run into when attempting to obtain a credit card. Obtaining this type of debit card can avoid the need to transfer funds from your Venmo account to your bank account.
There can be some fees associated with having a Venmo debit card. For instance, you incur a $2.50 fee when you withdraw funds from your Venmo account via an out-of-network ATM. There’s no fee for using an in-network MoneyPass ATM. A $3 fee applies for an over-the-counter cash withdrawal at a bank. Additionally, you can only withdraw up to $400 per day from your Venmo account.
Venmo and Taxes
If you’re only using Venmo to transfer funds to friends and family members, taxes won’t be an issue. If, on the other hand, you’re using Venmo to collect payments for your business, you may be responsible for paying taxes. If you earn over a certain amount during the year, you need to include any Venmo payments you received for your business on your taxes. Before starting any business, it’s important to understand what your tax responsibilities are.
Venmo Scams to Watch Out for
If you’re wondering “Is Venmo safe to use?” the answer is yes, it’s relatively safe to use. Venmo uses encryption security to protect your personal information from hackers. Its robust security features are in place to keep your money safe.
Even these robust security features can’t stop all scammers. But there are steps you can take to avoid this type of bank account fraud. It’s important to recognize these scams before scammers take advantage of you. Below is a look at the most common Venmo scams.
Fake Products for Sale
One of the most common Venmo scams involves online sales. The scammer pretends to be selling something online. However, once you make a payment, you never receive the product.
Once a Venmo payment is processed, you can’t reverse it and there’s no way to get your money back. This is why it’s so important to only submit payments to people and businesses you know and trust.
Pretending to Be from Venmo
Another common scam involves scammers pretending to be Venmo. If you receive an email or text message claiming to be from Venmo, don’t automatically assume it is. Some scammers send these messages to try to steal your personal information, such as your account number and password. Once they have this information, they can hack into your account and make payments without your permission.
Using Your Phone
There have been reports of strangers asking a person to borrow their phone. Instead, they actually open the Venmo account on your phone to send money to an account associated with them. Unfortunately, trying to do a good deed by letting someone borrow your phone could cost you hundreds or thousands of dollars.
Why Does Venmo Require Identify Verification?
If you open an account with Venmo, you’ll have to prove your identity. This isn’t just a Venmo requirement. According to the Consumer Identification Program under the U.S. Patriot Act, all financial institutions must verify the identities of all their customers.
This program helps prevent terrorists from sending and receiving money and helps to stop money laundering. It can also help reduce the risk of fraud on Venmo. However, even identity verification can’t prevent all forms of fraud. It’s important to always remain vigilant and report any suspicious activity to Venmo.
Staying Safe with Venmo
There are several things you can do to protect yourself when using Venmo.
Monitoring Your Account
Be sure to periodically check your Venmo account for unauthorized transactions. If you notice any, report it to Venmo immediately.
Set Up Venmo Notifications
Receiving notifications as soon as there’s suspicious activity on your Venmo account may help prevent a scammer from accessing your account. Always be sure to have your notifications on for Venmo.
Secure Your Account
There are multiple ways to secure your Venmo account if you lose your phone or allow someone to use it. First, turn on the PIN feature. This step requires you to enter a specific PIN number before you can even open your Venmo account. You should also set up the two-function authentication feature to make it even more difficult for someone to hack into your account.
Choose Private Setting
You may not realize it, but Venmo automatically makes all accounts public. While other users can’t see the specific details of your account, they can see how often you use Venmo. To keep your account safe, it’s recommended to switch your account to private so only your friends and family members can see your information.
Don’t Keep a High Balance
It’s recommended to avoid keeping a high balance in your Venmo account. This way, if your account is hacked, you’re not at risk of losing too much money. Instead, take steps to transfer your Venmo balance to your bank account as soon as possible.
Don’t Share Phone
Even if you’re using the passcode and two-factor authentication features, it’s recommended not to let a stranger use your phone. Only those you know and trust should have access to your phone.
Only Enter Venmo Through the App or Website
Don’t activate your Venmo account through a link you receive in an email or text message. This could be a phishing email designed to steal your Venmo account information, such as your account number and password. Instead, only access your Venmo account through the Venmo app or website.
Venmo Alternatives
Venmo isn’t alone in the payment marketplace. Like most other payment options, it has a long list of rivals. Let’s line up three formidable adversaries for comparison.
Tip: PayPal is another popular payment app. Check out our safety review for more information.
App Name
Venmo
Zelle
Cash App
Parent company
PayPal
Early Warning Services
Square
Need a bank account?
No
Yes—but you can still use and download the app if your bank doesn’t offer Zelle
No
Who can you pay?
Friends, family members and other people you trust
Friends, family members and other people you trust
Anyone, including contractors, utility companies and charities
Debit card available?
Yes
No
Yes
Can you hold a balance?
Yes
No—but Zelle is connected to your bank account by default
Yes
How much does it cost?
Free if you use a bank account, a debit card or your Venmo balance. If you use a credit card, Venmo charges a 3% fee. Instant outgoing bank transfers cost 1%, while standard bank transfers are free.
No fees to send or receive money. Your connected bank may charge fees, however.
Free if you use a bank account, a debit card or your Cash App balance. If you use a credit card, Cash App charges a 3% fee. Instant outgoing bank transfers cost 1.5%, while standard bank transfers are free.
Any limits?
You’ll have a $299.99 weekly peer-to-peer limit immediately after signup. If you confirm your identity, your weekly limit will go up to $4,999.99.
Limits depend on the financial institution. If your bank doesn’t offer Zelle, your weekly transaction limit will be $500.
You can send or receive up to $1,000 during a period of 30 days.
Venmo Versus Credit Cards
What if you don’t want to pay via an app, and you don’t like carrying cash around either? In that case, your best bet might be a credit card. You’ll need to ask your waiter or your cashier to split the bill, but most merchants are happy to oblige.
Look for credit cards with the following perks:
A low APR. Choose a low-interest credit card to save money on interest payments.
Cash back rewards. Why go for a standard credit card when you can get a little money back each time you shop?
Balance transfer offers. Transferring your balance from another credit card? In that case, look for a 0% balance transfer offer.
Credit builder cards. If you don’t qualify for an unsecured credit card, go for a secured card or a credit builder card to boost your credit score.
So is Venmo Safe?
Let’s recap. Venmo is a P2P payment app, and its parent company is PayPal. You can send money to friends, family members and other trusted individuals via Venmo. Some online stores accept the payment method, too. Venmo offers a debit card and—if you qualify—a credit card. You can fund your account with your bank account, a credit card or a debit card.
If you prefer not to pay by app and you don’t feel safe carrying cash, you might want to go with a credit card. Looking for the right credit card for you? Check out ExtraCredit® today. You’ll see select personalized credit offers when you visit your Reward It portal.