Somewhere between a sunroom and basement lives the daylight basement. Unlike basements that live entirely underground, daylight basements are only partially underground. Their defining trait is at least one or more windows that let the “daylight” in.
So, why are renters looking for properties with this unique space? With some imagination and a little design savvy (or a friend with some), you can turn these spaces into cozy family rooms, a playroom for the kids or a guestroom. Really, these rooms offer nearly endless possibilities. Let’s discover why renters are searching for the elusive daylight basement and what you can do with it once you find one.
What is a daylight basement?
Daylight basements are partially underground rooms with at least one full-sized window. And that’s about it. As you can imagine, they come in nearly every size and shape, with many found in homes built on slopes. This natural topography offers the ability to build into the sloping terrain, creating a space that’s partly in the ground yet has a window and a view.
These unique spaces are sometimes confused with walkout basements. However, unlike a walkout basement, daylight basements don’t have exterior doors.
What are the benefits of a daylight basement?
In addition to more room, which is almost always appreciated unless you’re a tiny-house aficionado, daylight basements offer several advantages.
Natural light: The natural light brings daylight indoors, providing a connection with nature. It’s a much more welcoming environment than basements with no outside view, enhancing the livability.
Expand the living area: Daylight basements can add significant usable square footage to your rental.
Cooler: Depending on where you live and the season, this feature can fall into the plus or minus column. Because they’re partially underground, they tend to be cooler than the rest of the house. It’s part of the reason basements first gained appeal. They offered a colder location to store food, mead and ale, helping these vital necessities last a little longer.
A room with a view: Need we say more?
Feels like a living space: Unlike basements that can feel dark and uninviting, the natural light of a daylight basement creates a warm and welcoming atmosphere.
What are some problems with daylight basements?
As with any room that’s partially below ground, there are a few challenges you may face.
Leaks: Because these rooms are lower than the rest of the house and partially subterranean, they’re more susceptible to leaks, excess moisture and water damage. Water can seep through the walls or find its way through any cracks in the foundation. If unchecked, this damp environment can lead to mold and mildew. Fortunately, the natural light makes daylight basements less susceptible to mold growth than in-ground basements.
Limited sunlight: Depending on the slope of the home and the direction it’s facing, there may be limited sunlight. If this is the case, consider asking your landlord for permission to paint it. Light-colored ceilings and walls, as well as mirrors, help make the space feel more open and brighter.
What is a daylight basement used for?
This extra space is up for grabs. Is there an artist in the family? Would a home office be beneficial? Maybe a home gym or a place for the kids to be, well, kids. Possibly a craft room, mancave or music room?
Here are a few of the top daylight basement design trends:
Game or media room: Do you enjoy entertaining or game night with the family? Daylight basements offer the perfect space for bringing everyone together. Depending on the size, you might consider a foosball or pool table, sitting areas for card and board games and a wet bar. Add a 4K HDR TV with a soundbar or speakers, and you’re prepared for the ultimate entertainment.
Home office: It can be challenging to fit a home office into a rental property, with bedrooms often destined for family members. This quiet, light-filled space can provide the ideal retreat, a place to work or read a good book. No one will know.
Home gym: We all struggle with finding the time (or the motivation) to work out. Having a room dedicated to keeping fit is nothing if not inspirational! Some popular options for home gym equipment include an elliptical or stair climber, stationary bike, punching bag, bench press or treadmill. Of course, you can always turn it into a hot yoga studio with some mats, blocks and a heater that can get the room to at least 90 degrees Fahrenheit.
When decorating your new space, check out our home decor color trends and the top 2023 Amazon home decor and furnishing selections for inspiration.
Depending on the setup, another option for your daylight basement may be subletting. Some renters, with the landlord’s permission and an okay from the local municipality, sublet the space, helping to defray the cost of the rental.
Is a daylight basement right for you?
It’s hard to beat a functional and stylish daylight basement. However, the added square footage often translates to higher rent. Consider your budget and how you would use the space to help you determine if this unique architectural addition is worth the cost. Also, make sure to check for excess moisture or mold before signing the lease.
Try to find the right place for you by searching our apartments and homes for rent in your target city.
If you own a home, you probably always have a list of improvements you’re considering. Maybe you desperately want to replace those dated kitchen appliances that scream year 2000, or you want to focus on ways to lower your energy bills, whether that means some strategic air sealing or adding solar panels.
Chances are, you also want any upgrades you pay for to increase the value of your home. You want to know that if and when it comes time to sell your place, you’ll recoup a good percentage of what you invested.
So, whether you have the cash saved up for home investment or you are looking to borrow for your next home project, consider these wise investments.
1. Improve Your Attic Insulation
We get it: You’re not going to invite friends over to see your new attic insulation.But it’s one of the best ways to increase your home’s energy efficiency.
You’ll not only profit when it’s time to sell, but you’ll also see immediate savings from the ongoing energy efficiency this upgrade provides. A properly insulated attic, combined with sealing air leaks throughout your home, cuts an average of 15% off your heating and cooling costs, allowing you to pocket the savings month after month. And who doesn’t want a lower energy bill?
Cost: $600 to $1,200 for blown-in insulation for a 1,000-square-foot attic. You may also need to rent the machine that blows in the fiberglass if you’re a DIY type. If you hire a pro, labor will run about $40 to $70 an hour. 💡 Quick Tip: Before choosing a personal loan, ask about the lender’s fees: origination, prepayment, late fees, etc. SoFi personal loans come with no-fee options, and no surprises.
2. Treat Yourself to New Windows
New windows can do double duty. Not only do they update a room’s tired appearance, they can also have energy-efficiency benefits. Depending on how many windows you replace, this can be a very big-ticket item. The average cost for a vinyl window replacement is $850, and a whole-home job can ring in at $20,091, according to Remodeling magazine. (Wood windows are pricier still.)
But here’s some good news: Replacing those windows adds value to your home. Typically, to the tune of 69% of the cost of the window-replacement project.
Cost: Anywhere from $850 per vinyl window to $20,000+ for the whole house. Again, if you go for wood vs. vinyl windows or need custom size ones (or several French doors), the price can ratchet up significantly. In that case, you might want to look at home improvement loan options.
3. Build a Deck
You and likely anyone who might buy your home in the future will love what a deck can do, lifestyle-wise. Weather permitting, you can have your AM coffee there, type away on your laptop during the day, and host friends, read, or just listen to the birdsong during off-hours. Here’s another nice thing about adding a deck: Your ROI is typically around 68% of the money you pay.
Cost: A new wood deck will cost on average $16,766. A composite one can cost more; on average, these are $22,426.
Read Next: How to Create a Renovation Plan to Match Your Budget
4. Refresh Your Bathroom
Who doesn’t love a beautiful new bathroom, whether your style is sleek and all white or if you prefer a warmer country cottage vibe? A bath remodel will cost, on average, between $6,627 and $17,494, according to Angi, the home renovation site. While an updated bath can definitely add to your home’s value, keep in mind that the sky’s the limit with the price tag. If you move the fixtures around and add one of those egg-shaped soaking tubs or a spa shower that has half-a-dozen mist settings, you may go well beyond the average range of costs.
Also, keep in mind that if you do something really singular (say, you pick tile in a super-bright shade), it may be harder to get your money out if and when you sell your property.
Cost: The average cost is $11,944, with cabinets and shelving accounting for 25% of the total, the shower and tub eating up 22% of costs, and your contractor’s fees usually being about 13% of your total expense. Of course, you can do a small bathroom remodel, perhaps repainting, adding some new artwork and a fresh shower curtain. 💡 Quick Tip: Home improvement loans typically offer lower interest rates than credit cards. Consider a loan to fund your next renovation.
5. Cook up a Cooler Kitchen
If you’re stuck with outdated appliances or hideous cabinets, a kitchen remodel is likely high on your list of improvements. It’s a great way to refresh your kitchen’s style and function.
But increasing home value with a new kitchen can fry your bank account: A remodel typically runs $14,612 and $41,392 according to Angi, but can cost much more if you move appliances’ position, opt for marble countertops, or fall in love with custom cabinetry. On average, you’ll recoup about 60% in ROI.
To update for less and wow your kitchen in a weekend, make some wallet-friendly upgrades: fresh paint, a new faucet, updated lighting (pendant lights are a good choice), and new cabinet pulls.
Cost: While you could just swap out cabinet pulls, which start at about $2 each, and repaint (plan on around $200), a larger kitchen remodel averages $26,849. Again, however, it’s worth noting you could spend multiples of that, depending on how large a project, how luxe the details, and where you live (cost of living can impact the price of goods and services in your area).
Recommended: Secured vs. Unsecured Personal Loans
The Easy Way to Finance HGTV-Worthy Upgrades
Even budget-friendly home improvements can set you back quite a bit. If you haven’t set aside the budget to bring more value to your home, you don’t necessarily have to dip into your retirement account or pay less on your student loans each month. You might want to consider a personal loan.
Think twice before turning to high-interest credit cards. Consider a SoFi personal loan instead. SoFi offers competitive fixed rates and same-day funding. Checking your rate takes just a minute.
SoFi’s Personal Loan was named NerdWallet’s 2023 winner for Best Online Personal Loan overall.
SoFi Loan Products SoFi loans are originated by SoFi Bank, N.A., NMLS #696891 (Member FDIC). For additional product-specific legal and licensing information, see SoFi.com/legal. Equal Housing Lender.
Disclaimer: Many factors affect your credit scores and the interest rates you may receive. SoFi is not a Credit Repair Organization as defined under federal or state law, including the Credit Repair Organizations Act. SoFi does not provide “credit repair” services or advice or assistance regarding “rebuilding” or “improving” your credit record, credit history, or credit rating. For details, see the FTC’s website .
Non affiliation: SoFi isn’t affiliated with any of the companies highlighted in this article.
Third-Party Brand Mentions: No brands, products, or companies mentioned are affiliated with SoFi, nor do they endorse or sponsor this article. Third-party trademarks referenced herein are property of their respective owners.
Financial Tips & Strategies: The tips provided on this website are of a general nature and do not take into account your specific objectives, financial situation, and needs. You should always consider their appropriateness given your own circumstances.
Inside: Do you find it difficult to stick to a budget, despite trying your best? If so, you’re not alone. Budgeting can be a tricky task, but by understanding flexible vs variable expenses, you will better manage your money.
Creating a budget is a fundamental step in shaping your financial well-being, and understanding how your expenses fit within this budget is essential.
These are expenses that can be easily modified or eliminated when monetary constraints arise, thus playing a significant role in stabilizing your financial health.
This post may contain affiliate links, which helps us to continue providing relevant content and we receive a small commission at no cost to you. As an Amazon Associate, I earn from qualifying purchases. Please read the full disclosure here.
What is a flexible expense?
A flexible expense is a budget item you can adjust or modify as per your financial situation. This wiggle room inherent in such costs is not vital for survival, unlike the rigidity of fixed costs such as rent or health insurance.
You can manage these flexible expenses depending on your financial goals or constraints, making them an important part of budget planning.
Fixed Expenses
Variable Expenses
Flexible Expenses
A fixed expense is a cost that remains constant and is paid at regular intervals, such as mortgage payments, car insurance, or cell phone bills, making it predictable and crucial for budgeting purposes.
A variable expense is a cost that changes over time, fluctuating based on individual decisions and circumstances, encompassing both essential spending like groceries and discretionary purchases like movie tickets.
A flexible expense is a non-essential cost in your budget that you can adjust, reduce, or eliminate to save money, encompassing diverse categories like vacation spending, beauty treatments, electronics, dining out, and entertainment services.
What is an example of a flexible expense?
There are countless opportunities for flexible spending, some of which we might not even realize. Common examples include:
Vacations: A sunny beach holiday might be highly appealing, but not always financially feasible. There are alternative, less expensive options such as a staycation.
Beauty treatments: Items like haircuts, manicures, and massages fall into this category.
Electronics: The urge to upgrade to the latest smartphone or tablet model is understandable, but if your current device works fine, that’s an expense you can postpone.
Food and dining: While we all need to eat, the amount spent on eating out, or grabbing a latte on the go can be adjusted.
Entertainment: Expenses here include streaming services, cable television, concerts, or movie outings. There are plenty of free things to do that don’t cost money.
Remember, the trick lies in distinguishing between what you need and what you want.
Distinguishing fixed expenses from flexible expenses
The main difference between fixed and flexible expenses lies in their ability to change.
Fixed expenses, like your rent, or more specific elements such as a lease payment, represent costs that you’re obligated to cover regularly. They’re usually consistent in amount and include items such as utilities, phone bills, insurance premiums, and car payments. Handling these sensibly is crucial as postponing or canceling these could lead to severe consequences.
On the flip side, flexible expenses vary and can be adjusted or cut out entirely depending on your financial situation. These can range from dining out and entertainment costs to clothing purchases and vacation expenses. By taking control of your flexible expenses, you can ensure financial stability, even when incomes fluctuate.
Flexible Expense List Questions to Ask
Are you incurring this expense out of necessity or is it more of a luxury or desire?
Do I have control over the total amount spent on this expense or is it a constant obligatory payment?
Can this expense be eliminated or reduced without drastically affecting your lifestyle or basic needs?
Does this expense vary from month to month or can it be controlled based on your financial situation?
If you were to face financial constraints, could this expense be readily cut back or postponed?
If you answered yes to these questions, then you have a flexible expense.
To further guide your financial decisions, sign up for our informative newsletter.
Which budgeting method works best for flexible expenses?
Choosing the best budgeting method varies greatly depending on your financial habits, goals, and discipline.
Regardless of the budgeting method you choose, remember that flexible expenses are the last thing that you prioritize in your budget.
Option #1 – Envelope System
The “Cash Envelope System” works well for many, where you allocate a specific amount of money for each flexible expense category in separate envelopes. You only spend what’s set aside in each envelope, assisting in keeping variable and flexible costs in check.
The envelope system allows you to save in advance for flexible expenses you want like a vacation or new car or even new clothing.
Option #2 – Pay Yourself First
Alternatively, the “Pay Yourself First” budget prioritizes savings. Something we like to do around here at Money Bliss.
Right after receiving your paycheck, you immediately transfer a designated amount into your savings or investments. The remaining money is then divided among your fixed, variable, and flexible costs.
Option #3 – Zero Based Budget
Lastly, the “Zero-Based Budget” is a method where every dollar you earn is allocated to a particular expense category, leaving you with a zero balance at the end of the month.
This 3 layer system starts with your fixed expenses, then moves to variable expenses. If you have money left over, then you can work on including those fun money flexible items or a deposit into savings account.
In essence, the best budgeting technique is one that fits your needs and aids in achieving your financial goals.
YNAB
Enjoy guilt-free spending and effortless saving with a friendly, flexible method for managing your finances.
Pros:
Comprehensive approach to budgeting, helping you plan monthly budgets based on your income.
Offers expert advice, making it suitable for those who require an in-depth, forward-thinking budgeting strategy.
Superior synchronization skills make it the winner in this area.
YNAB has extra features like goal setting for budgeting, shared budgeting tools for partners.
Option to manually add and upload transactions from accounts each month.
YNAB prioritizes user privacy.
Start 34 Day Free Trial
YNAB vs Mint
How do you budget for flexible expenses?
Budgeting flexible expenses may seem daunting initially, but with a systematic approach, it becomes manageable.
Here are the steps to follow:
Calculate Your Income: Identify your total monthly income after taxes, this is your starting point.
Identify Your Monthly Expenses: Take your bank and credit card statements; evaluate your spending habits to identify your expenses. Start with your fixed expenses as those are priority. Then move to variable and flexible expenses as your budget allows.
Set a Budget: Employ the 50/30/20 rule (or any other method that works best for you) to divide your income between essentials, flexible expenses, and savings.
Track Spending: Regularly monitor your spending against the budget set.
Adjust and Control: After monitoring, make necessary adjustments to control your expenditures.
Consistency: Continually follow these steps for a few months, change gets easier over time, and so will managing flexible costs.
Budgeting, especially flexible budgeting, allows for financial adaptability, enabling companies to seize unexpected opportunities or navigate emergencies without severe monetary strain.
How tracking your spending can help
Learning to recognize your overspending by diligently tracking can offer an enlightening picture of your financial habits. It aids in understanding where your money is being utilized and exposes any neglected ‘financial leaks’. A no spend challenge can help you pinpoint these issues.
Planning and then tracking your spending is crucial in forming an effective budgeting strategy. This is where a calendar can come in handy.
Tracking can be achieved manually via saving receipts, noting down amounts, or through digital means such as online budgeting tools or apps like YNAB or Tiller Money. With regular tracking, you can regulate your spending. Thus, ensuring you stick to your set budget, and make informed future financial decisions.
Tiller Money
Your financial life in a spreadsheet, automatically updated each day.
Tiller is the fastest, easiest way to manage your money with the unlimited flexibility of a spreadsheet.
Update your finances in one place, so you can take control of spending, optimize cash flow, and confidently plan your financial future.
Pros:
Tiller automatically updates Google Sheets and Microsoft Excel with your latest spending, balances, and transactions each day.
No more tedious data entry, CSV files, or logging into multiple accounts.
You can customize everything and finally track your money, your way.
Try Tiller Free
Tips and tricks for handling flexible expenses in your budget
Optimizing your budget while dealing with flexible expenses need not be a daunting task. Here are some tips to help:
Prioritize Savings: Always try to prioritize savings. One of our money saving challenges can help you.
Use Sinking Funds: This is money set aside to be used at a future time for a specific purchase.
Control Impulsive Spending: Limit frequent shopping trips, reduce eating out, and avoid buying unnecessary gadgets.
Substitute Luxuries with Alternatives: Option for budget-friendly alternatives like watching movies at home instead of the cinema, or cooking at home instead of dining out.
Utilize Budgeting Tools: Make use of budgeting apps or financial management tools that can track spending and help maintain your flexible expenses.
Practice Mindful Spending: Stay aware of your financial goals and make purchasing decisions that align with those goals.
Utilize Discounts: Seek opportunities for discounts that can contribute to these savings. For instance, some car insurance companies provide a discount for annual payments rather than monthly.
Remember, the goal isn’t to eliminate flexible spending entirely. But to strike a healthy balance that aligns with your long-term financial health.
Quicken
Personal finance and money management software allows you to manage spending, create monthly budgets, track investments, retirement and more.
I have used this platform for over 20 years now.
Pros:
Birds-eye view of your complete financial picture.
Conveniently download your spending activities, and automatically categorize them (Quicken connects to over 14,000 financial institutions).
Track investments with it’s features like portfolio analytics, retirement goals, and market comparison.
Cons:
Little complex to use at first, the learning curve is moderate.
Yearly subscription-based model to use the platform.
Save 40% on New Memberships
Our Review
FAQ
By tracking and managing these expenses, you can have more control and insight into your finances as this is where most unmindful spending happens.
It enables you to understand better where your money goes each month and helps avoid unnecessary spending. When you curtail these expenses, you free up money that can be used to pay off debts, save for future goals, or invest.
Therefore, skillful handling of flexible expenses allows you to maintain a well-rounded and healthy financial state.
Rent generally falls under the category of fixed expenses rather than flexible ones as it is typically a set amount due regularly.
Ready to Solidify Your Budget with these Examples of Flexible Expenses
Conclusively, budgeting with flexible expenses is an essential skill for effective financial management and becoming financially stable.
The key lies in balancing your needs and wants, recognizing and eliminating unnecessary spending while prioritizing necessities. Making use of budgeting tools, like the 50/30/20 rule, can also be advantageous and strategic.
Remember, it’s crucial to be aware not only of your income but also of where your money is spent, as gaining control over your flexible expenses can help avoid financial strain and achieve your financial goals. Always strive to adapt your spending habits to best fit your financial situation.
Now, learn how to handle unplanned expenses.
Know someone else that needs this, too? Then, please share!!
Did the post resonate with you?
More importantly, did I answer the questions you have about this topic? Let me know in the comments if I can help in some other way!
Your comments are not just welcomed; they’re an integral part of our community. Let’s continue the conversation and explore how these ideas align with your journey towards Money Bliss.
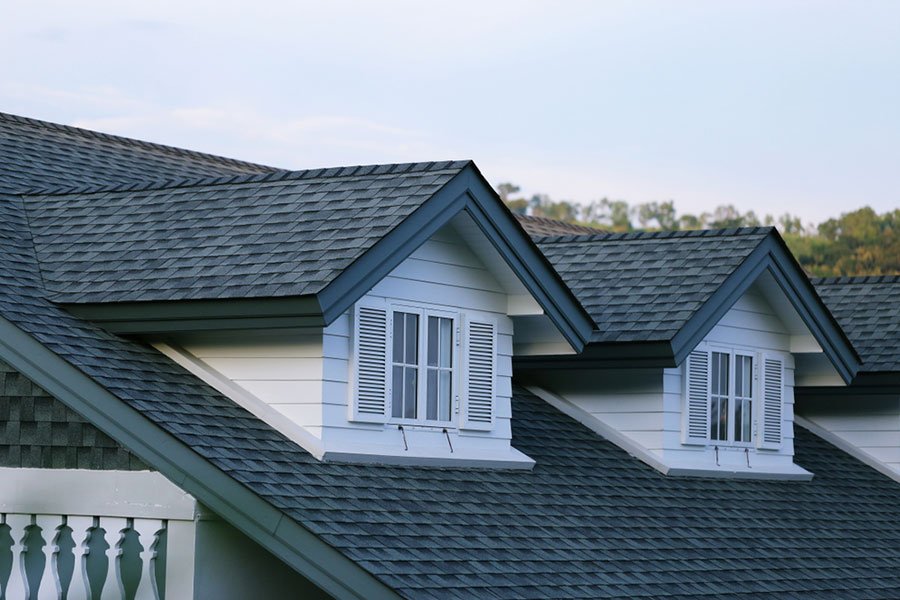
A roof over your head is a great blessing. However, homeownership has its ups and downs. One of those low points might be shelling out thousands of dollars to replace the roof that has protected you from the elements for years.
At some point, every roof will need to be replaced. It’s one of the many joys of homeownership. But, according to Angi, the average roof replacement cost ranges from $4,900 to $14,100. With a wide range of costs, you may be wondering how you can land the best deal.
The wide range of roof replacement costs is due to various factors such as style, location, the size of your roof, and the professional you hire.
Let’s take a closer look at how you can lower your overall costs and get ready for this significant undertaking.
Factors Affecting Roof Replacement Cost
The cost of replacing your roof can vary significantly based on several key factors. Understanding these factors is crucial for managing your budget effectively. Here are the primary elements that influence roof replacement costs:
Roofing material: The type of material you choose for your new roof can have a substantial impact on the overall cost. Materials like asphalt shingles are generally more affordable, while options such as metal or slate can be considerably more expensive.
Location: Your geographical location plays a role in cost variations. Areas prone to extreme weather conditions or high wind zones may require more durable and costly roofing materials.
Roof size and complexity: Larger roofs with multiple peaks and angles, as well as varying roof pitch, will require more materials and labor, leading to higher costs.
Professional you hire: The choice of roofing contractor can affect costs. Highly experienced professionals may charge more for their expertise.
Additional accessories: Roofing accessories such as flashing, underlayment, and ventilation systems can add to the overall expense.
Types of Roofing Materials and Their Costs
When it comes to replacing your roof, one of the critical decisions you’ll face is choosing the right roofing material. The choice of material not only affects the aesthetics of your home but also significantly impacts the overall cost of the project. Let’s delve deeper into some common roofing materials, their characteristics, and how they influence the cost of roof replacement.
Asphalt Shingles
Cost: Basic asphalt shingles are often the most budget-friendly option, with prices ranging from $1.20 to $4 per square foot.
Durability: They offer reasonable durability and come in various styles and colors to match your home’s design.
Energy efficiency: Standard asphalt shingles are less energy-efficient compared to some other materials.
Metal Roofing
Cost: Metal roofing tends to be more expensive, typically starting at around $5 per square foot.
Durability: Metal roofs are known for their longevity and resistance to harsh weather conditions.
Energy efficiency: They are highly reflective and can help reduce energy costs.
Slate Tiles
Cost: Slate tiles are among the costliest roofing materials, often exceeding $10 per square foot.
Durability: They are incredibly durable and can last for a century or more if properly maintained.
Energy efficiency: Slate tiles provide excellent insulation, contributing to energy efficiency.
Wood Shingles
Cost: Wood shingles fall in the mid-range of roofing material costs, typically starting at $5 per square foot.
Durability: They offer a charming, rustic look but may require more maintenance.
Energy efficiency: Wood shingles provide decent insulation but may not be as energy-efficient as some other options.
Solar Panels
Cost: Solar roofing can be expensive, considering both the cost of the panels and installation.
Durability: Solar panels have a long lifespan and generate renewable energy.
Energy efficiency: Solar panels are highly energy-efficient, potentially reducing your utility bills.
Clay Tiles
Cost: Clay tiles are often on the higher end of the cost spectrum, starting at around $10 per square foot.
Durability: They are incredibly durable and can withstand severe weather conditions.
Energy efficiency: Clay tiles provide good insulation, contributing to energy efficiency.
It’s important to note that the roofing costs mentioned here are approximate and can vary based on factors such as your location, the complexity of the project, and the specific product you choose. When selecting a roofing material, consider not only the initial cost but also its longevity and energy efficiency, as these factors can impact your long-term savings and the value of your home.
By understanding the characteristics and costs associated with different roofing materials, you can make an informed decision that aligns with your budget and aesthetic preferences. Keep in mind that the choice of material is a significant factor in determining the overall cost of your roof replacement project.
When Should You Replace Your Roof
The first thing you need to do is determine whether you really need a new roof. A visible hole in your ceiling is not the sign you should be waiting for. If you get your roof replaced before it reaches the final stop of its useful life, then you could be avoiding potentially bigger problems down the road.
A few signs that your roof is ready to be replaced include:
Water leaking into the house
Cracked shingles
Missing shingles
Shingles that are curling on the edges.
“Bald spots” on your roof where granules are missing.
Overall signs of age on your roof.
Another tip is to be mindful of your neighbors. If your homes were built in the same time period, then you may notice many new roofs in the area. It could be a sign that the inevitable demise is coming to your roof soon.
As soon as you spot any of these signs, you should start considering a new roof. The longer you wait, the more damage might be done to the value of your home.
If you are considering selling your home, do not assume that you can pass along the failing roof to the new owner. Many buyers will shy away from aging roofs because it is an added cost that they can easily avoid by choosing another home to buy.
Make sure to regularly take a closer look at what is happening on your roof. You can help prolong the life of your roof by taking care of it. For example, removing moss and algae growing in your shingles can prevent damage to the shingles can help prevent damage to your roof’s shingles.
How much does a roof replacement cost?
As with all things in life, you have choices for your roof replacement. The total roof replacement cost will vary considerably based on your choices.
The costs stem from the materials, labor, and disposal of your old roofing material.
In terms of material, you’ll need to choose between numerous shingles such as wood, clay, asphalt, solar, slate tiles, metal, and more. The material you choose may be based on cosmetic preference or necessary toughness to combat the elements of different locales. For example, in high wind areas of hurricane-prone Florida, homeowners are required to upgrade their roofing materials in hopes of withstanding potential hurricanes.
Asphalt shingles will most likely be your least expensive choice. An asphalt shingle roof costs about $1.20 to $4 per square foot to remove and replace an entire roof. Other materials, such as metal roofing, will generally cost at least twice as much per square foot. However, a new metal roof will likely save you money on homeowners insurance.
The cost to install 30-year architectural shingles is typically around $350 to $500 per square foot. And 50-year architectural shingles are even more expensive. Of course, they are stronger and last longer.
For labor, the size and construct of your roof will be a significant factor. If you have many peaks and ledges, expect your labor costs to be higher.
Assessing the Condition of the Current Roof
Before diving into a roof replacement project, it’s essential to assess the condition of your existing roof thoroughly. This step can significantly impact your overall cost and project planning. Here’s how to evaluate your roof’s condition:
Look for signs of damage: Check for water leaks, cracked or missing shingles, curling edges, bald spots, and any visible signs of aging.
Neighborhood trends: Pay attention to neighboring homes; if many have recently replaced their roofs, it might be a sign that your roof is due for replacement soon.
Preventive maintenance: Regular maintenance, such as removing moss and algae, can extend your roof’s lifespan and help you avoid costly roof repairs.
When evaluating the condition of your current roof, you might find that not all areas require a full roof replacement. In some cases, a partial roof replacement can be a viable option. This approach is typically chosen when the damage is localized to specific sections of the roof or when budget constraints are a concern.
Estimating the Size and Complexity of the Project
Understanding the size and complexity of your roof replacement project is vital for accurate cost estimation. Here’s how to estimate the scope of your project:
Measure your roof: Determine the square footage of your roof to calculate the amount of materials needed.
Consider roof design: Roofs with many peaks and angles may require more labor and materials, leading to higher costs.
Roofing layers: If your existing roof has multiple layers, removal and disposal costs will increase.
Roof features: Any additional features like chimneys, skylights, or roof vents can affect the complexity of the project.
Labor and Installation Costs
The cost of labor and installation is a significant part of your roof replacement budget. Several factors influence these costs:
Roof size: Larger roofs require more labor hours, leading to higher installation costs.
Roof complexity: Roofs with unique designs or many angles may demand more skilled labor, increasing costs.
Contractor expertise: Experienced contractors may charge higher labor fees, but their quality of work can be worth the investment.
Location: Labor costs can vary by region due to local labor rates and demand.
Additional Costs for Roofing Accessories
In addition to the primary roofing material and labor, there are other accessories and components that can impact your roof replacement cost. These include:
Flashing: Necessary for sealing roof joints and preventing leaks.
Underlayment: Provides an extra layer of protection beneath the roofing material.
Ventilation systems: Ensures proper airflow in the attic, which can affect the longevity of your roof.
Gutters and downspouts: Proper drainage is essential to protect your home’s foundation.
Removal and Disposal of the Old Roofing Materials
Before installing a new roof, the old roof must be removed and properly disposed of. This is a necessary step in the replacement process and can add to your project cost. Key points to consider:
The number of existing layers: Removing multiple layers of old roofing can be more labor-intensive and costly.
Disposal fees: Depending on your location, there may be fees associated with disposing of old roofing materials.
Potential Hidden Costs and Unexpected Expenses
While you plan your roof replacement budget, it’s essential to be prepared for potential hidden costs and unexpected expenses that may arise during the project. Some factors to be aware of include:
Structural damage: If hidden structural issues are discovered during the replacement, repairs can be costly.
Unforeseen leaks: Roofing projects can reveal additional leaks that were not visible before, requiring immediate attention.
Weather delays: Adverse weather conditions can cause project delays, potentially leading to increased labor costs.
Comparing Quotes from Different Contractors
To make an informed decision, it’s crucial to obtain multiple quotes from different roofing contractors. Here’s how to effectively compare these quotes:
Ensure each quote includes warranty information for both materials and installation.
Beware of significantly low bids, as they may indicate lower quality work.
Check online reviews to gauge the reputation of the roofing company.
Verify that the contractor is licensed by contacting your state consumer protection office.
How to Reduce Your Roof Replacement Costs
You should expect to pay thousands of dollars for your roof repair. However, there are methods to lower your overall roof replacement cost.
1. Hire a Professional Roof Inspector
If you’ve noticed that your roof is looking a bit worse for wear, then you should call in an inspector. Although it can cost a few hundred dollars to hire an inspector, it might be well worth the cost.
An inspector will be able to tell you whether you really need a new roof. They might recommend a patch or suggest that you wait a few years before replacing the whole roof. Either way, it will give you a better understanding of the problem at hand.
2. Replace or Repair?
After receiving the inspection report recommendations, you’ll need to decide whether you will replace or repair the roof. It is a good idea to go with the guidance of the inspector. However, as the owner, you have the final say in this decision.
3. Check the Home Warranty
When was your roof last replaced? If the answer is recently, then the replacement might be under warranty.
If you recently bought the home, you should check through the closing paperwork. Home warranty information is often available in that fine print. If you can’t find the information, consider contacting the previous owners to see if they can provide you with that paperwork.
The home warranty may cover your replacement costs, so it is an option you should look into.
4. Decide What You Want
Before talking to a roofing contractor or salesman, make sure you know exactly what you want on your new roof. Take the time to research the different materials and options and choose the one that will work well for your area and your budget.
Build an understanding of the features of your roof. Is it huge? Does it have many peaks and ridges that will increase labor costs?
With this level of research, you’ll be able to discuss the details of contractor bids coherently. Doing this homework helps ensure that you are not being taken advantage of. You might not need the latest and greatest product that the salesman attempts to sell you.
5. Compare Bids
Once you have a good understanding of what you need, then it is time to call in the contractors. Obtain estimates from various roofing contractors. Each bid should include roof warranty information on both the materials and the installation.
Do not automatically jump for the lowest bid. If the bid is significantly lower, do more research before accepting that bid. Sometimes very low bids translate into lower quality work. Online reviews of a roofing company may help you find out if the company is worth doing business with.
Make sure to confirm that the bid is from a licensed contractor. You can contact your state consumer protection office to confirm this.
Trust your instincts when choosing a roofer. You want a roof that will last for years to come at an affordable price. Cutting corners now will only cause more problems down the line.
6. Go the DIY Route
In the world of homeownership, there is always the option to fix the problem yourself. Although the roof is a high stake home repair, you may be able to do part of it yourself for a fraction of the cost.
The labor costs of a DIY roof replacement can account for the bulk of the expense. Sometimes, a contractor will allow you to remove the old roofing material yourself to cut the total cost. However, you should only pursue this option if you have the proper tools and knowledge.
7. Check Your Insurance Policy
If you are like most Americans, you carry a homeowner’s insurance policy on your home. In that case, the policy might cover roof damages.
Most insurance policies will help cover some or all of your roof replacement. However, if the need for replacement is due to neglect, then it is unlikely they will assist you. Call your insurance provider to find out how much they might be willing to cover.
8. Ask for a Discount
Most roofers are at the whim of seasonal work. In the winter, work can dry up in some places. Whereas in the summer, they can’t work through the jobs fast enough.
If you are willing to wait for a convenient time for the roofing company, then ask if they will give you an off-season discount. For example, you could request a 10% discount to wait until they have a slow month for your roof repair.
It never hurts to ask; the worst thing they can say is ‘no.’
Financing Options for Roof Replacements
Replacing a roof can be a significant financial undertaking. If you’re concerned about the upfront cost, consider these financing options:
Home improvement loans: Home improvement loans are tailored for renovation projects like roof replacement. They typically offer competitive interest rates and flexible terms, available from banks or online lenders.
Home equity loans or lines of credit: Leverage your home’s equity to finance your roof replacement. Home equity loans provide a lump sum upfront, while home equity lines of credit (HELOCs) offer flexibility in accessing funds.
Insurance coverage: Review your homeowner’s insurance policy to check if it covers roof replacement, especially for damage caused by specific covered perils like severe storms or hail.
Contractor financing: Many roofing companies offer financing options to help you manage the cost of roof replacement. When considering this option, inquire about terms, interest rates, and the company’s reputation to ensure transparency and fairness in their financing offerings.
Bottom Line
Understanding the cost of roof replacement is a crucial step for homeowners. It’s not merely an expense but an investment in the protection and value of your home. By taking the time to assess your roof’s condition, research materials, budget wisely, and seek multiple quotes, you can make informed decisions that align with your financial situation.
Roof replacement can be a substantial undertaking, but with careful planning and consideration, you can ensure the longevity and safety of your home. Remember that each roof is unique, and roofing costs can vary based on several factors. Whether you’re facing an imminent replacement or planning for the future, being well-informed is the key to making cost-effective choices for your roofing needs.
Frequently Asked Questions
How much does a roof cost?
The cost of a roof varies widely based on factors like size, materials, and geographic location. For standard materials like asphalt shingles, prices can range from $7,000 to $12,000 for an average-sized home. More premium materials like metal, slate, or tile can significantly increase the cost. Additional factors like roof design complexity, labor rates, and regional costs also play a crucial role in determining the final price.
What is the average cost of replacing a roof?
The average cost of replacing a roof in the United States is around $10,000, but pricing can vary widely depending on factors like the size of the roof, materials used, and geographic location. High-end materials or complex roof designs can push costs significantly higher.
How do different types of roofs affect the replacement cost?
The type of roof has a major impact on replacement costs. Asphalt shingles are generally the most affordable, while materials like metal, tile, or slate are more expensive. The complexity of the roof design, such as the presence of skylights or multiple levels, also affects the cost.
Are there any additional expenses associated with roof replacement?
Yes, there can be additional expenses beyond the basic cost of materials and labor. These might include costs for permits, structural repairs, gutter replacement, or disposal of the old roofing materials. These costs should be considered when budgeting for a roof replacement.
Does the size of the roof influence the cost?
Absolutely. The larger the roof, the more materials and labor will be needed, which increases the overall cost. Roofing costs are often calculated by the square foot, so a larger roof area will result in a higher total cost.
What factors can affect the overall cost of a roof replacement?
Several factors can affect the total cost, including the type of roofing material, the complexity of the roof’s design, the need for structural repairs, local labor rates, and whether the old roof needs to be removed first. Weather conditions and seasonal demand can also play a role.
Is roof removal included in the replacement cost?
In many cases, the cost of removing the old roof is included in the roof replacement quote. However, this is not always the case, so it’s important to clarify this with the contractor. The cost of removal can vary depending on the size and material of the existing roof.
Do I need permits for a roof replacement?
Yes, most local governments require permits for a roof replacement. The cost and requirements for these permits vary by location. It’s important to factor in these costs and ensure that your contractor handles the permit process.
Are there any financing options available for roof replacement costs?
Many roofing contractors offer financing options to help manage the cost of roof replacement. Additionally, some banks and credit unions offer home improvement loans. It’s advisable to compare rates and terms to find the best financing solution.
What are some signs that indicate a need for a roof replacement?
Signs that you may need a roof replacement include missing or damaged shingles, frequent leaks, sagging, and daylight visible through the roof boards. If the roof is more than 20 years old, it might also be time to consider replacement.
How long does a typical roof replacement take?
The time required for a roof replacement can vary, but most projects are completed within a few days to a week. Factors that influence the timeline include the size of the roof, weather conditions, and the complexity of the job. More complex projects or unforeseen issues can extend this timeline.
How much can I save by replacing my roof myself?
DIY roof replacement can lead to significant savings, primarily by eliminating professional labor costs. You may also reduce expenses by sourcing materials and handling waste disposal yourself.
However, while DIY can cut initial costs, it’s crucial to consider the value of professional workmanship, which often ensures quality and adherence to safety standards. Inexperienced DIY attempts might lead to costly future repairs, potentially offsetting the initial savings.
RVing, or traveling in a recreational vehicle, is an experience unlike any other. There’s nothing quite like taking your own bed, bathroom, fridge and other comforts of home with you, whether you’re camping in the woods or taking a road trip.
However, buying an RV can be a daunting experience, especially if you haven’t done it before. Trust me, I went through the process of buying an RV for the first time in 2020. If you’re thinking about buying an RV, here are some considerations and tips.
What to do before buying an RV
Choose the right RV type for you
The first decision in buying an RV is figuring out the right type of camper for your travel style. And the first major decision point is whether you want to be able to drive your RV or if you’d rather tow your camper. Here’s a high-level overview of the different types of RVs:
Drivable motorhome RV types:
Class A — large bus-like campers.
Class B — smaller van-like campers.
Class C — “classic” RV style, typically with an overcab bed.
(Photo by JT Genter)
Towed RV types:
Pop-up trailer — a small hitch-towed trailer that has sections that can be expanded out.
Fifth-wheel trailer — large to massive towed campers that are towed via the bed of a pickup truck.
Toy hauler trailer — a travel trailer that includes a garage for bringing motorcycles, bikes or other small vehicles.
Truck camper — a smaller camper that rides on top of a truck bed.
Each of these RV types has its advantages and disadvantages. It may seem simpler to get a drivable motorhome, but that means breaking camp each time you want to drive somewhere (e.g. to the grocery store or to explore a nearby attraction). Towable RVs can be left behind at camp when you want to drive somewhere, but they require much more effort to set up camp. If you plan to move sites often, you’ll spend a lot of time setting up and breaking down.
If you choose a towed RV type, make sure to check the towing capacity of your vehicle to see how much you can tow. You don’t want to go through the process of buying an RV just to figure out later that you now need to buy a more powerful truck to tow it.
Consider your options for buying an RV
Once you figure out which type of RV is best for you, you’ll need to figure out the best way to buy it. Should you buy new or save on a used RV? Should you buy from a dealership or a private seller? Is it worth buying an RV from a rental company for the savings?
The answers depend on personal preference — and budget. Used RVs can be much cheaper than new RVs but could have hidden issues.
My wife and I bought a former rental RV from El Monte RV for a fraction of the cost of a new RV. Our RV inspector checked it thoroughly and didn’t find any issues. Sure, the RV was a few years old and had 64,000 miles on it, but it had been well-maintained. We’ve only had minor issues the past few years — as with any RV.
(Photo by JT Genter)
Try renting before buying an RV
The best way of figuring out if an RV is going to be right for you is by trying it out yourself. Since each individual RV can be quirky, it’s best if you can rent the exact unit that you’re considering buying. If you’re considering buying an RV from an independent seller or from an RV rental company, ask if you can rent the RV for at least a few nights to try it out.
If you’re buying a new RV, you probably won’t be able to rent the exact unit you’re considering. However, try to rent a similar unit to make sure the size and features are a good fit for your travel style.
For example, my wife and I rented two models before buying our RV. The first rental required extending a slide to sleep in the master bed (see photo below). We learned that was a no-go for us, as we wanted the ability to book campsites that didn’t require the extra space to extend a slide.
(Photo by JT Genter)
After renting a towable RV, you might figure out you despise backing the unit into campsites. In that case, a motorhome might be a better choice. Or you might find that a Class C RV is too big and you’d rather have the flexibility of a Class B van. These are all personal decisions that are best figured out by renting an RV and trying it out yourself.
If you’re considering buying a former rental RV, consider taking advantage of Cruise America’s rent-to-buy program. This unique rental rebate program lets you get up to $3,000 off the purchase of a used Cruise America RV within six months of a rental. That gives you the chance to road-test a model. Plus, you practically get to try it for free — as the rental costs go toward your purchase.
Figure out financing and insurance
RVs aren’t cheap, and not all sellers will finance the purchase of an RV. If you aren’t paying cash, make sure you have financing lined up before you go through the process to buy an RV.
Also, contact your insurance company to set up insurance before you purchase an RV. You don’t want to have an accident shortly after driving your expensive new RV off the lot just to realize your insurance doesn’t kick in until a few days later.
Get your RV inspected by a professional
One of the best investments you can make when buying an RV is getting the unit inspected before you buy. RVs are generally assembled by hand and can have quirks or issues that you may not notice until after you’ve completed your purchase.
A full inspection will check systems and details that you may have never thought to check before buying your unit. When I bought my RV, the full inspection report stretched 94 pages and covered everything from inspecting the propane systems to a detailed inspection of the roof for any signs of leaks.
If you’re considering buying an RV…
RVing is one of the most freeing travel experiences there is. It’s incredible to head out on the road or into the wilderness with many of the comforts of home, giving you the ability to sleep pretty much anywhere.
If you’re only going to use an RV for a few weeks a year, renting is likely the most practical option. However, if you’d like to go on an extended road trip, want to camp more often or want to become a full-time RVer, you’re going to need your own unit.
An RV is not a cheap purchase, so make sure to do your homework. Figure out what type of RV works best for your travel style, decide on whether a new or used RV is best, test out the model you’re considering purchasing, make sure to have financing and insurance lined up, and — most importantly — have the RV inspected before you purchase it.
How to maximize your rewards
You want a travel credit card that prioritizes what’s important to you. Here are our picks for the best travel credit cards of 2023, including those best for:
When you buy through links in this article, we may earn an affiliate commission.
In the digital age, the concept of home is being reimagined by the advent of smart technology, transforming everyday living spaces into hubs of convenience, comfort and entertainment. Never has this been so clear as when you take even a cursory tour of the HGTV Smart Home 2023. If you need further evidence of just how expansive this industry is becoming, a study by Grand View Research, Inc. determined that the home automation industry will reach a staggering $444.98 billion by 2030.
Smart home technology, once fodder for dystopian storylines on TV, has evolved into a widely accepted seamless integration of devices and systems that streamline tasks, enhance security and personalize our environment. From the moment you wake to the soft glow of a sunrise simulation to the reassuring click of a smart lock securing your home at night, these intelligent systems work collaboratively to simplify routines, conserve resources and provide peace of mind. Smart home devices not only respond to our immediate commands but also anticipate our needs, learn our preferences and adapt to our lifestyles, offering a bespoke living experience that was once the stuff of science fiction.
Image Source: HGTV
Noteworthy tech in the HGTV Smart Home 2023
Each year, HGTV builds a new, technologically advanced home in a different location within the United States. The contest is typically run as a sweepstakes, where viewers can enter for a chance to win the annual smart home. Entries are usually accepted online through the HGTV website or via mail. The main prize is, of course, the HGTV Smart Home itself, which includes the home, all of its furnishings and the latest home technology. In addition to the home, there are often other prizes, like cash awards or vehicles.
Coolest devices in the 2023 HGTV Smart Home
Laid out below are just a few of the most highly sought-after pieces of smart home tech in this year’s HGTV Smart Home 2023 and their less expensive counterparts.
GE Profile Kitchen hub
The GE Profile Kitchen Hub is a unique and high-tech kitchen appliance from General Electric. It’s designed to serve multiple functions and is geared towards making the kitchen experience more interactive and connected.
Interactive screen: The GE Profile Kitchen Hub features a large touchscreen display that can be used to access recipes, watch videos, control smart home devices and more.
Vent hood: The screen is built into a vent hood, allowing it to sit above your range or cooktop. This design not only provides essential ventilation but also offers a central view for following recipes or watching videos as you cook.
Cameras: The device includes front-facing and downward-facing cameras. The front-facing camera can be used for video calls, while the downward-facing camera is intended to capture your cooking, which can be useful for sharing your culinary adventures on social media or with family.
Integrated apps: The Kitchen Hub comes with a suite of applications designed for the kitchen. These can include recipe apps, music and video streaming services and other smart home integrations.
Connectivity: Being a smart device, the Kitchen Hub connects to your home’s Wi-Fi network. This allows it to pull up recipes, stream content and interact with other smart devices in your home.
U+ Connect: This is GE Appliances’ smart platform that allows various devices to connect and communicate. For example, if you have a GE oven, the Kitchen Hub can interact with it, setting temperatures, timers and more.
Not looking to shell out nearly $1,200 for this type of tech? Consider an Alexa. While not as advanced as the Kitchen Hub, it is still a solid virtual assistant option for the kitchen.
DAKboard Wall Display v2 Plus
DAKboard is a digital wall calendar that integrates with various online calendar services to display your events, tasks, weather and other custom information. The DAKboard Wall Display v2 Plus is one of their products, designed to be a versatile, visually appealing display for personal and professional environments.
Screen: The Wall Display v2 Plus includes a high-resolution screen designed to make texts and images clear and easy to read from a distance.
Customization: DAKboard is known for its highly customizable displays. Users can choose different layouts, fonts and color themes to match their preferences or interior design.
Connectivity: The device connects to Wi-Fi to sync with various online services like Google Calendar, Apple Calendar, Microsoft Outlook and others.
Photo display: Besides showing calendar and weather information, DAKboard devices can cycle through personal photos or artwork, making them a dynamic alternative to traditional picture frames.
Integration: DAKboard devices support integration with various third-party services for weather, to-do lists, news and more.
While the Dakboard Wall Display v2 Plus will run you close to $500, the Skylight Calendar is a solid replacement for around to $200 less.
Image Source: Samsung
Samsung AirDresser Grand
The Samsung AirDresser is an in-home garment refreshing system, which uses air and steam to clean and deodorize clothing. It is part of a new category of home appliances intended to reduce the frequency of traditional washing and dry cleaning.
Jet air and air hangers: The system blasts air to loosen and remove dust from inside and outside your clothes.
Steam cleaning: It uses steam to sanitize clothing, removing bacteria, viruses and allergens.
Deodorization filter: The filter captures and reduces odors, leaving clothes smelling fresh.
Gentle drying: Clothes are dried at a low temperature to reduce the risk of shrinkage and heat damage.
Smart control: Integration with Samsung’s SmartThings ecosystem to monitor and control the device remotely through a smartphone app.
Self-cleaning: An internal system helps to maintain the device by removing scale and residue.
Wrinkle care: The AirDresser can smooth out wrinkles without the need for ironing.
Capacity and design: The AirDresser Grand offers a larger capacity to accommodate more items of clothing and potentially an updated design or premium finish.
Not nearly as fancy as the $1,100 AirDresser Grand, a handheld steamer, like the Conair Turbo EstremeSteam is a great option for quick sanitization and keeping clothes wrinkle-free with ease.
SimpliSafe Wireless Home Security System
SimpliSafe is a company that offers a variety of home security products and services, with an emphasis on ease of installation and use. Their systems are known for being wireless and user-friendly. These systems are typically marketed toward homeowners and renters looking for a quick, easy and effective DIY security solution.
DIY installation: SimpliSafe systems are designed for easy setup without the need for professional installation. The devices can be placed on shelves or adhered to walls without drilling.
Variety of packages: SimpliSafe provides different equipment packages to suit various home sizes and security needs. You can start with a basic set and expand with additional sensors and accessories as needed.
Components: A typical SimpliSafe kit includes a base station, which is the central hub of the system, wireless door and window sensors, motion detectors and a keypad. Additional components might include glass break sensors, smoke detectors, carbon monoxide detectors and panic buttons.
No contract monitoring: SimpliSafe offers optional professional monitoring services on a month-to-month basis, without the need for long-term contracts. This professional monitoring can dispatch emergency services in case of a break-in, fire or other incidents.
Smartphone control: SimpliSafe has an app that allows you to arm and disarm your system, receive alerts and monitor your home from anywhere.
Integration: SimpliSafe systems can integrate with smart home devices and platforms, like Amazon Alexa and Google Assistant, allowing for voice control and other smart home automation.
SimpliCam: They offer an indoor camera called SimpliCam, which can be used to keep an eye on your home while you’re away. It comes with features like motion alerts and the ability to stream live video.
Design: SimpliSafe sensors and devices have a discreet and modern design to blend in with home decor.
Battery and cellular backup: The system is equipped with battery backup to keep your home secure during a power outage, and the professional monitoring service includes cellular backup to maintain communication with the monitoring center if the Wi-Fi goes down.
Environmental protection: SimpliSafe also offers sensors that detect water leaks and freezing temperatures to help prevent environmental damage in your home.
Privacy protection: Features like camera shutters allow customers to control their privacy.
While the Simplisafe wireless home security system is great, it does come at a price, of about $320. If you’re looking to spend a little less, don’t fret, Amazon is full of more affordable DIY wireless security systems.
Moxie Showerhead and Wireless Speaker
The Moxie Showerhead and Wireless Speaker is a product by Kohler, known for combining the functionality of a showerhead with the entertainment feature of a wireless speaker.
Showerhead: It’s designed to provide a full-coverage spray, offering a quality shower experience with good water pressure.
Removable wireless speaker: The center of the showerhead houses a wireless speaker that can be easily detached and used independently. The speaker connects to devices via Bluetooth to play music, podcasts or other audio streams.
Water-resistant: The speaker is designed to be water-resistant, which is essential for any electronic device used in a shower.
Rechargeable battery: The speaker has a built-in rechargeable battery. When fully charged, it supports several hours of playtime.
Magnetic docking: The speaker is held in place with magnets, which makes it simple to detach and reattach to the showerhead.
Harman Kardon sound: Some versions of the Moxie speaker are engineered with sound by Harman Kardon, delivering a high-quality audio experience.
Voice assistant compatibility: Depending on the model, the speaker can sometimes be compatible with voice assistants, which would allow you to control music and other functions with voice commands.
Multiple colors and finishes: The Moxie showerhead may come in a variety of colors and finishes to match different bathroom decors.
Installation: It’s designed to be easy to install, fitting onto a standard shower arm.
For those who enjoy listening to music or podcasts in the shower, the Moxie Showerhead and Wireless Speaker system brings convenience and a bit of luxury to the everyday routine. If you’re looking for the same luxury at a more affordable price, you’re in luck. There are plenty of showerhead speaker combos at all price points on Amazon.
Image Source: Kohler
Anthem Digital Shower Control
The Anthem Digital Shower Control is another Kohler product that provides a high level of personalization and precision for the showering experience. It is designed to provide a user-friendly interface to control various aspects of the shower.
Digital interface: The Anthem Control includes a minimalist display with easy-to-read buttons.
Customizable settings: Users can save their preferred shower settings, making it easy to start the shower with their personalized preferences at the touch of a button.
Multiple outlet controls: The system can control multiple water outlets, allowing users to switch between them or use them simultaneously for a luxurious shower experience.
Smart home integration: Advanced models feature integration with smart home systems, enabling control via voice commands or through smartphone apps.
Easy installation: Even though it is a sophisticated system, companies like Kohler design these controls to be as easy to install as possible, sometimes compatible with existing plumbing.
Safety features: Many digital showers include safety features like automatic shut-off after a certain period or if the water gets too hot, which can prevent scalding.
Energy saving: Some models offer features that help conserve water and energy, aligning with eco-friendly practices.
If you’re after the type of precision temperature control that only a digital display like the Anthem Digital Shower Control can provide, consider the much more streamlined and affordable BLTFAUCER Digital Display. While it doesn’t provide as much customization as the Anthem model, it will allow you to achieve and monitor the exact shower temperature you want.
Elements Hexagon Starter Kit
The Elements Hexagon Starter Kit is a product by Nanoleaf, which is a company known for producing smart lighting solutions that are popular for their modular, geometric design and customizable lighting scenes. The Elements Hexagon Starter Kit is part of Nanoleaf’s Elements line, which focuses on combining smart lighting technology with decor.
Hexagonal panels: These are the core of the product, designed to be attached to form patterns on your wall. They’re hexagon-shaped to allow for a variety of configurations.
Wood look: Unlike the original Nanoleaf light panels, which have a very futuristic look, the Elements line has a more natural wood-like appearance, allowing them to blend into home decor more seamlessly when turned off.
Customizable lighting: Users can customize the illumination of each panel to create scenes or set the ambiance. This can include warm to cool white light settings, designed to mimic natural elements like a fireplace or thunderstorm.
Interactive control: The lights can be controlled via an app, where users can select or design scenes, schedule on/off times and adjust the brightness. They can also respond to touch or sound.
Smart home integration: The kit is compatible with most smart home systems, allowing for voice control.
Rhythm feature: With the rhythm feature, the panels can synchronize with music in real time, creating dynamic light shows in response to the audio they detect.
Simple installation: The panels attach to the wall with adhesive strips, which are included in the starter kit, making for a relatively easy setup without needing to drill holes.
Expandability: The starter kit includes a certain number of panels but can be expanded by purchasing additional expansion packs at any time.
The Elements Hexagon Starter Kit is a great system for incorporating upscale and entirely unique lighting into a space. That said, there are also a ton of customizable hexagon lighting solutions on Amazon for a range of prices.
Smart home. Seamless tech. Smiling faces.
The rise of smart home technology stands as a testament to human ingenuity and the quest for an enhanced quality of life. As we look to the future, the integration of these intelligent systems into our homes continues to evolve, bringing new levels of ease and enjoyment. These devices do more than just perform tasks — they create experiences, foster safe environments, and cultivate moments of joy and relaxation.
In a world where time is precious and personal happiness is paramount, the smart home is less about the gadgets and more about the freedom they afford us — the freedom to spend less time managing our homes and more time savoring the pleasures of life. As we embrace this era of connected living, we find that the true genius of smart home technology lies in its ability to fade into the background, creating a symphony of convenience.
Looking for your own place to add tech to? Whether you want to replicate the HGTV Smart Home 2023 or just add some DIY home automation, the future revolves around tech-forward homes. Check out our available apartments and houses for rent.
The cost to replace a chimney ranges from $1,000 to $15,000, depending on the type and size of the chimney. You can install a smaller or prefabricated chimney for $1,000 to $5,000, but a full masonry chimney replacement cost can reach $15,000.
Below, we’ll explain new chimney cost factors, break down labor and materials expenses, discuss financing options, and help you determine if you might be able to replace the chimney yourself.
Chimney Replacement Costs: An Overview
How much does a chimney replacement cost? Anywhere from $1,000 to $15,000. A full chimney replacement is on the higher end of that range while a partial replacement — or a basic prefab chimney installation — is on the lower end.
In some cases, it might be possible to repair the chimney instead of replacing it. Chimney repair costs typically range between $1,000 and $3,000, though it varies depending on the extent of the damage.
Recommended: The Ultimate Home Maintenance Checklist
Full Chimney Replacement
A full chimney replacement costs between $5,000 and $10,000 — or up to $15,000 in some cases. Prefabricated chimneys are the lowest-cost option. You’ll pay moderate prices for a metal chimney and the highest prices for a brick chimney.
Partial Chimney Replacement (Rebuild)
You may only need to replace part of a chimney, like the stack, which extends above the roof. In other cases, you may need to pay for the repair of specific elements, like collapsing mortar, a damaged chimney crown, or a cracked flue.
Partial chimney replacement costs may top out at $5,000 while repair typically ranges between $1,000 and $3,000 per job.
Recommended: Home Improvement Calculator
Chimney Installation Labor Cost
Labor makes up a large portion of the cost to replace a chimney. Depending on your geographic location, if you can reach the chimney by ladder or you need scaffolding, and the type of chimney being installed, labor rates may range from $50 to $150 an hour for an experienced mason.
You will usually need to hire a structural engineer before the mason can begin their work, which adds to your overall labor costs. Depending on where you live, that can cost around $500.
Chimney Installation Material Costs
Material costs vary depending on the type of chimney being replaced, rebuilt, or repaired. Prefab chimneys have lower material costs while masonry chimneys require more expensive materials like bricks and mortar.
Chimney Installation Cost Financing
Paying for a new chimney — or even a more basic chimney repair — can be difficult on a tight budget. If you don’t have the money in emergency savings, you can explore other options like:
• A payment plan with the contractor: Ask the contractor if they can set you up with a payment plan over a set number of months, rather than requiring the full payment all at once. Costs may be higher if you go this route.
• A credit card: Some contractors will let you pay with a credit card but be careful. Your credit card may have a high APR, and if you can’t afford to pay the full bill at the end of the month, you could end up paying a lot of interest, which will make the new chimney even more expensive.
• A home improvement loan: Home improvement loans are a low-cost option for homeowners. These personal loans typically have a lower interest rate than your credit card, and you can choose repayment terms — often three to five years — that make sense for your budget. A personal loan can be a cost-effective way to pay for common home repair costs.
• Home equity loans: Homeowners can also tap into their home equity with a home equity loan or home equity line of credit (HELOC).
Before you decide on the best financing option, you will want to compare the difference between home equity loans vs. home improvement loans.
Can I Replace the Chimney Myself?
A chimney replacement requires special skills and training. A lot can go wrong if you install or repair a chimney incorrectly. It could become a fire hazard or potentially collapse. No matter your DIY skills, we highly recommend hiring a qualified mason to tackle all repairs and replacements.
Recommended: How to Keep Inflation From Blowing Your Home Reno Budget
What Factors Impact a Chimney Replacement Price?
Several factors can impact your overall chimney replacement cost, including:
• Permits needed: You’ll almost always need to get a permit for larger chimney replacement projects. Permit costs vary depending on your state and municipality.
• Level of work required: Wholesale chimney replacements cost significantly more than minor work. For example, chimneys may just require some repointing or tuckpointing to keep them in good shape, or you may need to replace the crown or cap or only rebuild the stack. If you have to replace the whole chimney, it may require demolition, which can be expensive. Talk with your contractor about the extent of the work to get a better idea of the total chimney installation cost.
• Type of chimney: Prefab chimneys are the most affordable to install. You’ll spend more to replace a metal chimney, but the most expensive type of chimney to replace is a brick one.
• Size and location: Larger chimneys will cost more to replace than small ones. Chimneys that are easy to access (by ladder, for example) are also more affordable to repair or replace. If the positioning of the chimney makes it harder for the contractor to access, labor costs will be higher.
Signs Your Chimney Needs to Be Replaced
How do you know when it’s time to replace your chimney? Here are a few signs to watch for:
1. Crumbling brick: If the brick is visibly crumbling or deteriorating, call a mason quickly to determine the extent of the damage and begin the repair or replacement work.
2. Leaks: If your chimney is the source of leaks (look for water damage to the surrounding walls and ceiling), it’s time to call a contractor to look at it.
3. Cracks: It’s good practice to have your chimney inspected each year. During the inspection, the contractor will look for large cracks. These could be a sign that it’s time to repair or replace the chimney.
The Takeaway
Chimney replacement costs can range from $1,000 to $15,000 — it’s not a cheap project, but luckily, it’s also not a common one. Get your chimney inspected every year, and keep up with regular maintenance and cleaning. Unless there’s unexpected storm damage or the chimney is old, you may not have to replace the chimney the entire time you live in your home.
Think twice before turning to high-interest credit cards. Consider a SoFi personal loan instead. SoFi offers competitive fixed rates and same-day funding. Checking your rate takes just a minute.
Replace your chimney asap with a home improvement loan from SoFi.
FAQ
How long does it take to replace a chimney?
Basic chimney repairs can be quick: A professional should be able to repair a partially damaged chimney in one to four days. Significant damage may lead to longer timelines — in some cases, it might take weeks or even months to repair and rebuild a chimney.
Can I replace my chimney myself, or do I need to hire a professional?
Replacing and repairing a chimney requires specialized knowledge, skills, and equipment, not to mention physical strength. If you make even a small mistake when replacing your chimney, you might accidentally cause a leak, inadvertently create a fire hazard, or build a structurally unsound chimney that could collapse. Always hire a professional for this work.
What qualifications should I look for in a chimney replacement contractor?
When looking for a contractor to work on your chimney, always confirm that they are licensed and insured. You should also verify that they’re certified by the Chimney Safety Institute of America.
Ask the contractors if they offer warranties or guarantees for their work and read reviews online to make sure they provide quality services. You can also ask them for references.
How do I compare quotes from different chimney replacement contractors?
Before getting quotes from any chimney replacement contractors, read online reviews and ask the contractors about their licenses, insurance, and certifications. Only get quotes from qualified contractors.
When comparing quotes, look not just at the overall cost but also the timeline to ensure they can replace your chimney quickly, if needed. Also verify what is and isn’t covered in the quote. For example, has the contractor included the necessary permits, or is that a separate cost not part of the estimate?
You’ll also want to ask about their payment schedule and how they prefer to be paid (cash, check, or credit card, for example).
Are there permits or inspections required for chimney replacement, and how much do they cost?
When replacing a chimney, you almost always will need to get a permit and an inspection. The costs will vary depending on where you live, but you might pay up to $500 for an inspection by a structural engineer, and permits can reach $150.
How often should I replace my chimney, and what factors affect its lifespan?
A well-built chimney should last several generations of homeowners. In theory, you may never need to replace your chimney (but regular inspections are a good idea). If you do replace your chimney, you likely won’t need to replace it again as long as you’re in that house.
That said, certain elements may need to be repaired or replaced more frequently. Chimney liners, for instance, last 15 to 20 years, and mortar lasts 25 to 30 years.
Extreme weather, like high and low temperatures, hail, and earthquakes, may shorten a chimney’s lifespan, as can exposure to water. As your home settles over time, it may also lead to premature cracks in your chimney.
What are the risks of not replacing a chimney that is in disrepair?
If you ignore the signs that it’s time to replace or repair your chimney, you’re exposing your home to a lot of risk. Water could more easily get into your home, leading to mold and mildew. Walls, ceilings, and floors could deteriorate over time, and the inner workings of your chimney would be exposed to rust. Eventually, your chimney might collapse, leading to much more expensive and extensive structural damage to your home.
Photo credit: iStock/AntonioSolano SoFi Loan Products SoFi loans are originated by SoFi Bank, N.A., NMLS #696891 (Member FDIC). For additional product-specific legal and licensing information, see SoFi.com/legal. Equal Housing Lender.
Financial Tips & Strategies: The tips provided on this website are of a general nature and do not take into account your specific objectives, financial situation, and needs. You should always consider their appropriateness given your own circumstances.
Before you buy a homeowners policy, your insurer might require a home insurance inspection. This inspection isn’t the same as the one you had when you bought your house. Instead, it’s a way for insurance companies to see the condition of your home, evaluate your coverage needs and decide whether they’re willing to insure you. Keeping your home in good shape can help this process go smoothly and ensure you get the coverage you need.
What is a home insurance inspection?
A home insurance inspection helps insurers understand the risks of covering your house. It allows your insurer to figure out how much it would cost to rebuild your house and to spot any issues, like fire hazards or weak structures, that might lead to insurance claims in the future. This information helps the insurance company decide if your home is in good enough shape to insure, and if so, how much your premium should cost.
Not all homes will undergo these inspections. Your insurer might require an inspection if:
You have a high-value or older home.
You live in an area at risk of tornadoes, hurricanes, wildfires or other hazards.
What can you expect during a home insurance inspection?
You might not need to be present for an exterior inspection, but you will if the inspector is checking the interior of your home for things like wiring, plumbing and safety features. The inspection could take up to a few hours, depending on how detailed it is.
For an external inspection, the inspector may look at things like your roof, windows, doors and chimney. They may also check for hazards like overhanging trees or cracks in the walkways.
An interior inspection may involve examining walls, ceilings and floors for signs of water damage or pests. The inspector may also assess the state of your plumbing, electrical, and heating and cooling systems. They’ll often check safety features like smoke detectors, carbon monoxide detectors and security systems, too.
🤓Nerdy Tip
Your insurer may use your home insurance inspection to verify that you qualify for certain home insurance discounts. For example, many companies offer savings for having a home security system.
How to prepare for a home insurance inspection
Before your home insurance inspection, do your own thorough check to avoid being caught off guard by any problems. (You may want to hire a professional for some of these tasks.)
If you spot any potential issues, fix what you can or reach out to a contractor who can help. Here are a few key places to focus on.
Exterior of the house
Roof: Have a roofer check for damaged or missing shingles.
Gutters: Clear debris and ensure your gutters are secure.
Chimney: Look for cracks or loose bricks; consider a professional cleaning.
Trees: Trim branches away from the house.
Siding, doors and windows: Check for cracks, leaks and damage.
Walkways: Ensure there are no tripping hazards.
Yard: Remove loose debris and get rid of pools of water near your home that could lead to pests.
Interior of the house
Detectors: Ensure smoke and carbon monoxide detectors work.
Fire extinguisher: Check to make sure it’s operational.
Fireplace: Clean it out if you have one.
Windows, walls, doors and plumbing: Check for signs of leaks, cracks and pest issues.
Attic and basement: Look for signs of water or pest damage.
HVAC system: Have a professional clean and test your system.
What if you fail a home insurance inspection?
If your home doesn’t pass the insurance inspection, don’t worry — you have options. Make sure to act quickly. Being uninsured, even for a short time, is risky. A lapse in coverage can make it harder and more expensive to get a policy in the future. And if something happens while you’re not insured, you’ll be financially responsible.
Fix the issues
Your inspector may point out problems like a leaky roof or electrical issues. If your insurance company denies you coverage for fixable reasons like these, address them if you can.
Find a different insurer
If you were denied coverage because you live in an area at high risk for crime or severe weather, ask your neighbors who they use for home insurance. You can also ask the previous homeowners or reach out to a local independent insurance agent.
Not all companies have the same rules. Some insurers are pickier than others about the age of your roof, for instance. So if you can’t afford to get a new roof or make other major repairs, try another company. If one insurer says no, another might say yes.
Dispute the decision
If your insurer drops you due to a failed home insurance inspection and you don’t agree with the decision, you can dispute it. Be prepared to provide evidence to support your case, such as receipts for work you’ve had done on the house or a property assessment from an independent inspector.
You can also file a complaint with your state’s insurance department. It can conduct its own research into your claim and work with your insurance company to resolve the issue.
Look into state-run insurers
Many states have programs to help homeowners who struggle to get insurance. For example, Fair Access to Insurance Requirements (FAIR) plans are designed for high-risk homes that private companies won’t insure. An independent insurance agent can help you find programs like this in your area.
Whether you’re selling your home to begin a new adventure or refinancing your existing home, getting an appraisal with the value you want is an important hurdle to clear. You may feel that the appraisal process is out of your control, but there are many easy and inexpensive ways to get both yourself and your home ready.
We put together a checklist of our top tips below. But first, let’s quickly cover the basics of home appraisals.
What Is a Home Appraisal and Why Is It Important?
A home appraisal is an unbiased report on the value of your home performed by a trained and state-licensed individual. Appraisals are an essential part of the home financing process, ensuring the homebuyer, seller and mortgage lender each have an impartial, consistent and accurate assessment of the value of the property under consideration.
The lender is responsible for ensuring that your home provides adequate collateral for the mortgage. For most loans, the lender obtains a signed and completed appraisal report that accurately reflects the market value, condition and marketability of the property.
It’s the appraiser’s job to provide a factual, unbiased and detailed description of the property and the neighborhood. They must take into account all factors that influence a home’s value when developing the market value opinion in the appraisal report.
Home Appraisal Cost
While home appraisal costs can vary by state and property size, the fee can range between $300 and $1,200. Most fall somewhere around $600-$1,000, with costs based primarily on the geographical area of the home.
How Long Does a Home Appraisal Take?
From start to finish, the home appraisal process usually takes approximately 7-10 days to complete.
The required in-person visit by a home appraiser can take over an hour, depending on the size of your home. However, several other steps are involved in making an unbiased and professional assessment of your home’s value. Your appraiser will research trends, local county records and recently closed comparable homes in your area, known in the industry as “comps.”
Once your appraiser compiles and analyzes all the information and data, they will present a final report of your home’s value.
What Do Home Appraisers Look For?
A home appraiser uses several sources of information to determine a property’s value. As part of the assessment, the appraiser will visit the property in person and review recently completed sales of comparable homes. Common factors examined during home appraisals include:
Property size. In real estate appraisals, size significantly affects the final number. In general, the higher the square footage of a home, the higher its value. An appraiser will also look at the kitchen, number of bedrooms, bathrooms and closets.
Exterior condition. When assigning a value to your property, the appraiser will consider not only the exterior appearance of your home but also its condition. They will check the following:
The condition of the roof, foundation, siding, gutters, chimney and walls, looking for signs of leaks, mold and other safety hazards
Lot size, including front and backyard square footage
Pool, outdoor kitchen, deck, porch and other amenities
Interior condition. Again, this refers not only to the appearance of the interior but also to the working condition of standard household assets such as:
Plumbing
Electrical and HVAC systems
Doors and windows
Light fixtures
Any kitchen appliances to be included in the sale
Attic, basement and foundation. A finished basement or attic may impact a home’s value, but these areas must meet specific requirements to be considered part of the Gross Living Area (GLA). An appraiser will also evaluate your home’s foundation and its condition.
Home improvements and renovations. Tell your appraiser about any work or upgrades you have done to spruce up your home. This can include anything from the central air system you installed 10 years ago to the kitchen flooring and countertops you just renovated (along with the new oven and fridge to match, of course).
What Hurts a Home Appraisal?
If an appraisal is in your future, it’s essential to understand the factors that could negatively impact it, such as the following:
Low-value comps and decreasing neighborhood property values
Poorly maintained interior or exterior
Age of the home
Location, such as a flood zone or busy road
Signs of mold, insect infestation, leaks or other safety concerns
Issues with the home’s systems, such as plumbing, electric or HVAC
Lack of parking
Hazardous construction materials like lead paint or asbestos tile
Outdated or faulty plumbing, electrical and heating systems
Some issues are in your control and some may not be. Whether you choose to address the correctable concerns or not, being aware of crucial appraisal criteria can help you avoid the potential unwelcome surprise of a lower-than-expected home value.
Top 7 Tips Home Appraisal Checklist
How does one best prepare for a home appraisal? We put together a checklist of common (and not-so-common) tips to help you get a high valuation from your appraiser.
1. Do Your Own Appraisal
Imagine that you are the appraiser. Walk around your home’s interior and exterior and really scrutinize it as if you were going to complete the appraisal report yourself. Take note of any obvious damage or deferred maintenance that needs your attention. Leaks, broken systems and damaged surfaces should all go on your list of things to repair.
Thoroughly inspect safety equipment like smoke alarms, carbon monoxide alarms and home security systems. Are they all functioning, or do parts or entire systems need to be replaced? Make a plan to repair these issues and clean up any cosmetic issues that may have occurred as a result.
2. Investigate Comps
Check out recent home sales in your neighborhood. What has the price range been for homes with features and updates similar to yours? The values of these comparable homes should be similar to what your home will appraise for. This information can help you know where to focus your time, efforts and funds.
If you know a neighbor (or real estate agent) who recently sold a home in your area, contact them to find out if there were any appraisal issues or insights that they can share.
If you’re working with a real estate agent, you can request that they collect some comps for you and your appraiser to review. Particularly if your home has unique or uncommon features, your agent may need to get creative while staying within the guidelines for selecting comps.
A quick way to get a rough idea of how much your home is worth is to use a home value estimator calculator. Add some basic information to gauge your home’s current value and view recent home sales in your area.
3. Get Superficial
Clean your house from top to bottom and remove extra clutter. Once you’ve scrubbed and straightened up everything possible, consider making some easy, low-cost cosmetic updates that can have a big impact, like the following:
Paint or touch up existing paint
Hang updated window treatments
Replace worn faucets, doorknobs and cabinet hardware
If you’ve been planning to update your decor after you move, consider bringing in a few of the newer pieces to make the old house look fresh and modern. Downsizing or packing for a long-distance move? Ask your real estate agent if they have staging furnishings you can borrow or recommendations for a service you can use.
4. Make Your Outdoor Areas Truly Great
Now that your home’s interior looks fantastic, it’s time to pay attention to the exterior. Make sure that your landscaping is looking its best by doing the following:
Mow your lawn, trim your trees and bushes
Remove weeds and dead vegetation
Add color with inexpensive, seasonal flowers in the spring, summer or fall, and ensure that snow removal is neat and tidy in the winter
You’ll also want to:
Remove outdoor clutter, like yard tools and stray toys, from everywhere on the property
Consider staging any outdoor living spaces with new furniture or accessories
Power wash your home’s exterior, as well as your driveway and any deck or patio surfaces
Ensure your pool is well-maintained and in safe operating condition
Most of this can be accomplished in a weekend, and the increased curb appeal will be worth it.
Check out expert tips for outdoor home renovations — you may find just the right improvement to increase your value!
5. Be Sure To Share Your Upgrades
Tell your home appraiser about the improvements you’ve made to your home. Inform them of upgrades like the following that will positively impact your appraisal value:
New features that you have added, like a security system
Updated HVAC units
Exterior improvements like siding, gutters or a new roof
High-value room remodels like kitchens and bathrooms
An easy way to make sure that your appraiser remembers all of these improvements is to create and share a short, one-page list detailing each. You should have this list ready in advance and include any applicable permit information.
6. Know Your Neighborhood
Make your appraiser aware of any recent improvements in your overall neighborhood. It’s worth mentioning things like:
New or highly rated schools
Parks
Transportation enhancements
Shopping
Other beneficial amenities
These kinds of changes can add significant value to your home, and if your appraiser is not a local resident, they may not be aware of them. Appraisers are often familiar with the general area, but you probably know your specific neighborhood better than they do.
7. Stay Focused
While you are working your way through the tasks and updates listed above, it’s important to remember not to go overboard and take on too many projects. Invest your time, money and effort only on issues that clearly need attention. If you’re getting an appraisal for a home you’re selling, you most likely already have a buyer who liked your home enough in its current state to make an offer on it. Making unnecessary major changes could end up being a waste of your time and resources.
Your home’s selling price is affected by much more than just the appraisal! Find out how the time of year can increase your sale price.
Although it’s not possible to change your bungalow into a country estate overnight, taking the time to tackle a few strategic projects before your appraisal can help put you in a better position to get the outcome you want. If you’re ready to move or refinance the home you love living in, get a custom mortgage rate quote from Pennymac today. Our Loan Experts can answer your questions and help guide you through the mortgage loan process.
Share
Categories
buying a home selling a home appraisal fundamentals
When buying a home, it can be challenging to know what to look for. Should you look for a garage, a spacious bedroom or even a big driveway? You could, but you should also look for structural aspects of the home. Ensuring that the house you are buying is made with quality materials that will not either wear down or break, will project a happy and safe home ownership.
Enjoying our content? Subscribe to our free weekly newsletter to get real estate market insights, news, and reports straight to your inbox.
Below are the specific things you should look for in a house to make sure that your future home will stand strong!
Exterior Face
The base of a house is what keeps it afloat. Making sure that you have a safe foundation is key.
Brick is very low maintenance and long-lasting but there are limited colour options and it does get quite expensive. Brick is also eco-friendly and is resistant to fire and infestations that may occur. It is also a great temperature regulator that can increase the comfortability of your home.
Vinyl Siding is quite durable in various weather conditions and is significantly cheaper but it is not as eco-friendly and can be susceptible to leaks. Though vinyl siding doesn’t require a lot of maintenance, in the case that it does break or tear, the entire plank will need to be repaired which can become costly.
Roofing
Metal roofing is more expensive, lasts usually twice as long as asphalt, endures worse weather, has better energy efficiency and tends to weigh less, putting less stress on your foundation.
Asphalt roofing is cheap and easier to install, it is somewhat durable but can be damaged with weather.
Slate roofing is made up of tiled slates that can come in various colours. This roofing type is very durable, fire-resistant and eco-friendly as it can be recycled. The downsides are that it is very expensive, heavy and takes a lot of work and precision to install.
Foundation
Looking for the foundation can help buyers avoid costly repairs if it is already damaged and possibly leaking. Always remember to ask the realtor about the foundation if it is not visible. Here are the three types of foundations:
Insulation concrete form incorporates insulated forms and poured cement. This option is expensive but increases energy efficiency and is far stronger than any other form.
Poured cement is the standard foundation for many homes. It is reliable and durable with a lesser tendency to crack while being easier to repair if needed.
A cement block wall is more prone to leaking because of cracks that can occur and is harder to fix, but is the more affordable option.
Windows
It is also important to inspect the windows on the property and make sure that they are operating properly. Faulty windows can spike your energy bill and be a safety concern. Here’s what to do and look for:
Double-pain glass is something to look for as this means that you have quality windows. This helps with sound, energy efficiency and durability.
Research the manufacturer of the windows if you can’t tell to see the credibility of the window and if it is a quality brand.
See if they are operating properly. Are they moving smoothly and sealing with no cold air seeping through?
Doors
Just like windows, it is vital to check your doors for operational malfunctions so you can enjoy your home to the fullest. Here’s what to look for:
Are they operating properly? Ensure that there is no air drafting through, no major cracks visible and that there is no condensation between the glass panel of your door.
Check the weather stripping around the door to ensure proper sealing which helps with energy efficiency and comfortability.
Are you currently looking for a property? Call us today to talk with one of Zoocasa’s experienced real estate agents to guide you through the exciting home-buying journey!